![LHCD New Battery for iPhone 6, 2500mAh High Capacity Li-ion Replacement Battery, Professional Full Set Repair Tool Kit and Instruction -[2 Year Warranty]](https://images-na.ssl-images-amazon.com/images/I/414x%2BwIRUBL._AC_SL3840_.jpg)
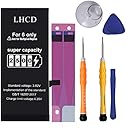


LHCD New Battery for iPhone 6, 2500mAh High Capacity Li-ion Replacement Battery, Professional Full Set Repair Tool Kit and Instruction -[2 Year Warranty]
Product ID: 148890629
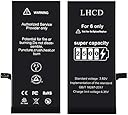
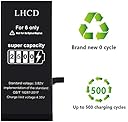
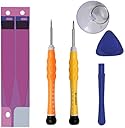
BUY NOW and Enjoy power life from now on! Specifications: -Compatible model: iPhone 6 only, Model A1549, A1586, A1589. NOTE: Not for 6 Plus or 6S, 6S Plus. - Capacity: 2500 - Battery Material: Li-ion - Rated Voltage:3.82V 2500mAh super capacity replacement battery for iphone 6 only, with CE, FCC and ROHS quality certificates. Made of high quality top rate A battery cell, manufactured and tested under strict quality control standards. Mature process technology, strict product testing.UL,FCC, CE and ROHS Certified. NOTES: 1:Confirm the phone model 2:In order to avoid damaging your device, we recommend to watch more professional video on YOUTUBE and follow it step by step for easily installation. 3:Make sure your device battery drains below 20% before disassembling, otherwise it will catch fire or explode if accidentally puncture. 4:If your device can not turn on after installation, please try to reconnect the battery connector and charge your device. 5:At the beginning, new battery is unstable, and it will reach optimal performance after charging and discharging completely for 5 cycles. 6:To reach optimal performance, please use original charger and charging core to charge the battery PACKING LIST - 1 LHCD iphone 6 Battery - 1 "+" Phillips Screwdriver - 1 "*" Pentalobe Screwdriver - 1 Installation Guide - 1 Spudger - 1 Set of Adhesive Strips - 1 Suction Cup - 1 Opening Gasket -1 Customer Service Card
G**R
2500mAh battery for iPhone 6 tips and tricks
This battery kit for the iPhone 6 was very well appointed with one exception; no tweezers. The trickiest part of the installation is removing the old battery by pulling on the sticky tape (like a command strip). The best way is to grab it with tweezers or small needle nose pliers and pull straight out (don't try to peel the tape around the corner). Just stretch that tape as long as you can. It will come out and remove the adhesive. If you break it, just stick your tweezers under the battery slightly and grab any part of the tape. If you pull slowly, it will start stretching and you can regrip. After removing both sides of the tape, the battery comes out easily. Put the new command strip on the bottom of the battery by removing the backing of the tape and placing both strechy things on the underside of the battery with the ends aligned to the bottom edge of the battery so the black tabs can wrap around to the front of the battery. Then after removing the other film, algin the battery left edge to the left edge of the phone (put it perpendicular to the placement to align the edge and slowly lower the right edge so that the battery can drop in the right place. The battery connector should align to the circuit board connecter. Place the connector so it seats properly and push down gently until you feel it snap into place. If it doesn't look underneath the connector so you understand where the little square things can align to the connector on the board. Other than that, it is a relatively simple install and a great bargain for a higher capacity battery than the OEM version.
T**E
Easy Peezy! Saved 1\2 the cost. Works in minutes. You can do it.
Happy ☺ i bought and replaced 2, for myself and my wife's iPhone 6s. I was apprehensive at first and went super slow watching a Jerry rig video online (highly recommend you do too). We couldn't be happier. Like new. Our phones hold a charge again! It was fully charged at 8am and after modest use, it is at 88% at 4pm. It would have cost me $50 per phone and a wait time of 3-5 days if I had sent it to Apple. I saved half the expense and an unnecessary trip by doing it myself. I suggest a flat surface and a good lighting. Those screws are tiny! And a steady hand.
A**R
Needs better directions
I don't have background in electronics, but I can follow good directions. I struggled understanding some of the directions--parts were very specific and easy to understand--others were very vague. I should have watched a video before replacing the battery, but I just depended on the directions in the package. I ended up frying my phone so now I have to replace it and I have lost all of the data since my last back-up. :(
M**E
Great product...one minor flaw...
Overall, this is a 5 star product. Very happy with final results...my iPhone 6 works again.The ONLY flaw with this, is the part where it does not tell you how to properly peel off the correct plastic backing, and in which order. I peeled off the wrong plastics, and when I went to apply them to the battery, they folded back on themselves. Sadly, there isn't an extra set to try again. Maybe a second set of adhesives could be put in, just in case someone messes up their first attempt ;)Other than that, I am perfectly satisfied with the purchase. The instructions were VERY clear aside from the above notation. And I highly recommend this to anyone looking to extend the life of their iPhone 6, instead of being forced to buy a new phone that is 10x too expensive then necessary.
T**K
5 Star Candidate:
I'll bump this up to 5 stars if the battery performs well over time. So far I am very happy with the kit and battery performance. The tools worked great. The battery seems well made with a precise fitting connector. BE SURE to keep track of where each internal screw was removed from. There are several different sizes and they are very small. DON'T MIX THEM UP. The instructions are good enough but be sure to watch the YouTube video first. This product is a 5-star candidate.
J**E
Battery Set Worked Great, but get some magnifying glasses for the install!
The battery and tools came just as described. I highly recommend picking up some cheap magnifying reading glasses because the screws are super small and hard to see if you don't have perfect vision. I read the directions and then looked for a video online to follow and that worked fine. Hardest part was getting the small screws positioned back to put everything back together. Highly recommend this set.
M**G
You will need a magnifying Glass to see the tiny screws and connectors.
Overall a very good product, but not for non-technical types.Removal of the original battery takes a lot of effort. I used a big flat head screw driver to get underneath the battery, then walk the screw driver from side to side, slowly down the length of the battery until it starts to separate. Don't use the connectors or other components as a fulcrum just hard metal case etc. Phone is like new now with 100% battery.
M**H
Easy to install but watch a you tube video
I ordered this battery not sure if I could change it but it is inexpensive so I gave it a shot. The battery arrived a week earlier than I expected. The directions were easy to follow but I watched a you tube video anyway to familiarize myself with the process. The video said it would take four minutes but since I have never done it it took me ten. The battery has done very well in my phone. I live in a rural area where my phone searches alot and the battery normally goes dead in a day. This battery is lasting about two and a half days before I have to charge it. Overall I am very happy with how fast it was shipped, how easy it was to install, and how long it lasts. On top of all that it has a two year warranty.
Trustpilot
3 weeks ago
1 month ago