


Buy anything from 5,000+ international stores. One checkout price. No surprise fees. Join 2M+ shoppers on Desertcart.
Desertcart purchases this item on your behalf and handles shipping, customs, and support to Croatia.
🔑 Unlock effortless, secure garage access—because your lifestyle deserves smart simplicity.
The Chamberlain Clicker KLIK2U-P2 is a universal wireless garage door keypad compatible with over 90% of North American openers, including major brands. Featuring quick wireless programming, Security+ 2.0 encryption, and a weatherproof sliding cover, it offers secure, convenient keyless entry via a personal 4-digit code. Backlit keys ensure usability in any lighting, and the package includes a 9V battery and easy-to-follow instructions for a fast, tool-free installation.


| ASIN | B0014XOS64 |
| Alert Type | Motion |
| Assembly Instructions Description | Included, straightforward, part of the user manual |
| Battery Cell Type | Alkaline |
| Best Sellers Rank | #175 in Home Security Systems |
| Brand | CHAMBERLAIN |
| Built-In Media | 9V Battery, Manual |
| Color | White |
| Compatible Devices | Smartphone |
| Connectivity Technology | Wireless |
| Control Method | App |
| Customer Reviews | 4.4 4.4 out of 5 stars (11,035) |
| Installation Method | Self-Adhesive |
| Item Dimensions | 1.2 x 2.5 x 5.9 inches |
| Item Type Name | Garage Door Opener Keypad |
| Item Weight | 0.23 Kilograms |
| Manufacturer | Chamberlain |
| Manufacturer Warranty Description | 1 Year |
| Maximum Range | 11 Inches |
| Mfr Part Number | KLIK2U |
| Model Number | KLIK2U-P2 |
| Power Source | dc |
| UPC | 012381173419 |
| Unit Count | 1.0 Count |
| Video Capture Resolution | 480p |
| Voltage | 9 Volts |
M**R
Easy Install - this universal relotes really does work!
I just installed this unit today - so this review is based on installation and compatibility, not long term performance. I am definitely NOT the tool person in this house, but my partner's honey-do list is too long. So I gave it a try. This keypad is a replacement for my Craftsman, bought in 1998. We have a second garage door with a Genie unit I bought last year. I will get to installation in a minute, but I have to say, this key[pad dependably opens the door every time (well, at least the first 10 times or so!), unlike my Genie, which is very hit or miss. I am pleased and surprised that this seems to work so reliably. I was nervous, having red the reviews, about installing the unit. I decided to program the remote before mounting, partly because we had bought another brand's universal remote and it worked fine. Also, it is a two person job if you mount the unit before pairing. The first thing I did was find my opener's "learn" button - not so easy, as it was hiding behind the lightbulb. That was the hardest part. I have a red button. I followed the instructions carefully. I did not add an "0" before pressing 2, to indicate I have the red learn button. I followed each step promptly, but not rushing. I would estimate I held buttons down for a full second, maybe 2 seconds for the learn button, and immediately proceeded to the next step. And guess what? It worked on the first try! The programming took 5 minutes at most. EASY PEASY. Some people have had difficulty with the cover - me too. I had to force it open with a screwdriver, having hand issues. So I took one reviewer's advice and modified the cover slightly. Here's how: Slide the cover off. Inside you will see two lines of plastic on each side that stick out. The short line of plastic is on the upper end. Look at the long line. Take a very sharp knife (like a box cutter or utility knife) and shave some off to taper the top of the long line of plastic (the end nearest to the short piece). Do this on both sides and the cover easily slides up. Don't be intimidated by the programming, follow the simple directions closely - you can do this. We were considering replacing the entire garage door opener. We had bought a Genie universal replacement keypad first, and that didn't sync up with this opener, so we thought we were up a creek. I am very happy that we decided to make this purchase.
K**Y
It worked!
When I ordered this keypad, I was not sure it would work with my garage door opener. I have a Stanley 3200 "Residential Door Operator". I'm not sure when the device was made, but I'd bet it's the original that my house was built with 25 years ago. The item arrived on-time in a normal brown shipping box. Inside the box was Amazon's normal plastic balloons for cushioning and the keypad in its retail box, which is a clamshell (you'll need scissors to open it). Inside the clamshell was the keypad, instructions, and 2 screws for mounting the keypad. The battery (9v) was already installed in the keypad. Instructions/Compatibility: At first glance, the instructions look complicated, but upon looking closer, I could see that there were actually 4 sets of instructions for 4 different types of garage door openers. The following have instructions provided: Garage door openers with: - 3-position DIP switches (Chamberlain, Sears Craftsman, LiftMaster, Master Mechanic, and Do It brands) (do a search on Amazon or Google Images for "dip switch" if you are not familiar with the term) - 2-position DIP switches (Genie, Linear, Stanley, and Moore-O-Matic brands) - Yellow, white or grey Smart/Learn buttons (Chamberlain, Sears Craftsman, LiftMaster, Master Mechanic, and Do It brands) - Smart/Learn buttons (Chamberlain, Sears Craftsman, LiftMaster, master Mechanic, Do It, Genia Intellicode, Overhead Door, Stanley, Wayne Dalton, or Linear brands) -- Note that these instructions say to visit www.clickerproducts.com for Genie Intellicode II instructions. Set-up was a breeze.. for me, I just had to look at the configuration of DIP switches on the door opener or on the remote control that I already had programmed. I selected a 4-digit code (note that this device only allows 4-digit codes, it does not support shorter or longer codes), found my opener ID in the instructions (by brand, not model), wrote down my DIP switch configuration, and then programmed the keypad with all of that information. The instructions serve as something of a work-sheet that makes this process real easy. When I was done programming the keypad, I went outside and tested it, but it did not work. At the end of the instructions, there is a note about what to do if the keypad does not work: "If opener does not function, flip DIP switches, so if a switch is "on" or "up" flip it "off" or "down" in step 3. Basically, all this meant was during programming, if you entered a 1, change it to a 2, and if you entered a 2, change it to a 1. So, I quickly re-programmed the keypad (less than 30 seconds), went back outside and tested it. Worked perfectly to open and close the garage door. Then I followed the instructions to mount the keypad. I removed the cover, battery faceplate (1 screw) and the battery. I put each of the 2 screws in the mounting holes and drove them into the wood next to my garage door. Note that if you have a material other than wood, you may need to drill guide holes first - I did not have to. Then I replaced the battery, the battery faceplate, and the cover, and I was done. In all, I think the process took about 15 minutes, and that was only because I to go inside and outside a few times to get the garage door opener, drill, and test the keypad twice. Of course, I cannot speak to the reliability of this device over time, since it was just installed, but so far, it's great.
P**I
Excellent!
I have a super-old Craftsman garage door (with the dip-switches) that I use this for. I was worried that it might be too old to work with this keypad, but had no problems. It was so easy to set up. It took me less than 5 min to get it working. The hardest part of this whole installation was retrieving my tools! (drill, drill bits, and phillips screwdriver). I would say this keypad only has four (very) minor drawbacks: 1) as others have mentioned, the cover slides up and down, as opposed to pivoting on a joint. This motion is a bit annoying compared to swiveling a cover open on a hinge 2) I wish they would have put a little instruction card on it somewhere, so you can easily keep the pin change instructions with it. (My other keypad has this on the inside cover) 3) the keypad only has the numbers on the buttons, and not the corresponding three letters that align with those buttons (like on a phone keypad). My other keypad has this, and my original code was based on a word that my whole family knows. Now we have to also remember the numeric code which is less convenient. 4) also as others have mentioned, the "0" key doubles as the enter key. This just seems silly to me, but it's no big deal of course. Tip: To solve drawback number 2, print the pin-code change instructions in 9-point font-size on three separate lines on a plain white sheet of paper. Cut that out, and use clear shipping tape to attach those instructions to the battery cover (on the bottom of the keypad). This way, if you need to change your pin after 2 or 3 years, you won't have to go looking for the manual, or just blindly try a bunch of different methods. As a sidenote: I figured this "Clicker" brand would work. My other garage door (that already had a keypad when I bought the house) is a much newer LiftMaster. About 5 years ago I bought a Clicker brand universal remote with three buttons. Programming for the two different (brand and generation) garage doors concerned me, but they both worked no problem. My wife still uses that remote today.
R**S
Works Great, Installation Easy (UPDATED)
UPDATED 1/24/18 — SEE BELOW I bought this from Amazon on September 9, 2012, to use with an older Lift Master garage door opener that was manufactured in November 1995 and has the smart-learn feature. This replaced an older version of a very similar keypad made by Chamberlain, which I purchased and installed in 2004. My old one had worn out (buttons no longer made contact consistently, especially in damp weather, preventing the door from opening or closing). Once I got the new one set up and installed, it worked great, far better than the one it replaced. The buttons always connect and the door opens and closes on demand. However, even though I am very adept with computers and so forth, I found the instructions to be confusing and it took several tries to get the thing working (hint -- go through ALL of the steps without pausing between any of them). Worse, when I got in my car the day after installing this clicker, my car's built-in garage door button no longer worked. I got out the manual and went through all the steps, only to discover that my hand-held transmitter no longer worked. I had to reprogram that, then use it to reprogram the car's system. Oddly, the change didn't affect my wife's car. UPDATE: The Clicker I bought on 9/9/2012 worked flawlessly until January 2018 when it started getting difficult to enter the code, and on 1/23/18 it died completely. Even the lighted keypad quit working, and a new battery would not revive it. I assume it was killed by our recent rains. Nonetheless, as it had worked well for 5½ years, I ordered another from Amazon. This time the installation went smoothly. The Clicker programmed quickly and easily, and I had no issues with either the car or the hand-held remote. Only odd thing was the lower mounting hole was moved from the left to the right side of the battery compartment, necessitating the drilling of another hole in my plaster wall. I also had to enlarge the holes in the Clicker slightly to accommodate the mounting screws I was using, which are considerably larger than the ones that came with the unit. Hoping this one lasts longer than the last one, I do recommend it.
R**W
Good opener, keep it away from a metal door
This was easy to program and install. After I programmed it I opened and closed the door; great. I installed it close to the door, inside the frame, and tried it again; nothing. I opened the door with another remote and the door opened. I used this Chamberlain to close the door and it worked. I took it down and tried it again in my hand; worked for opening and closing. I had to think about it for a moment and then it dawned on me that the door and frame were both aluminum. I moved the Chamberlain a few inches away from the metal door (still on the metal frame) and tested it again; worked both ways. So if you have an aluminum door, before you screw down the opener, test it at the position you want to use to make sure it works in both directions. The previous opener I got (and returned) wasn't waterproof or even water resistant. I installed it, it rained, the opener was full of water and stopped working. I replaced it with this Chamberlain which has the sliding door to cover the face; much better.
B**4
So far 5 stars, will update if things change
So far 5 stars. Not sure why some posters said it was to hard or complex to install, it was very simple with clear instructions. (See picture of instructions) Took me longer to screw it to the wall, which only took a few minutes vs setting pin number The sliding door needed an initial opening with a screw driver ,but I opened it and closed it a half dozen times by hand afterwards and have no problems once I hung it up. It should be tight when new, as it means it will keep the rain and snow out. Some posters said the programming and pad are defective as they can press any button to close it, that's how it's made to function. BUT you need the code to open it , period. I played with it before hanging it to make sure there wasn't any problem as they complained about, it functions perfectly Great value and functions as described. >>IF this changes I will update review<<<
S**R
Perhaps because of changes, it now does NOT work with old, DIP switch (non-"learn") openers
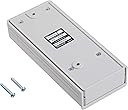
I have an old Sears Craftsman garage door opener (GDO). So old, that it uses dip switches -- it doesn't have one of those "learn" buttons that you use to link it to a GDO keypad. I bought this KLIK2U-P2 because it claims to be "universal", and also claims that it works with these old dip-switch openers. When it arrived, the lettering on the box said KLIK2U-P2, but a sticker added to the side of the box indicated KLIK2U-P2MC. Turns out that the "MC" is a recent release, which allows the user to change the frequency of the emitted signal. The included instructions all referred to a learn button. However, the instructions also stated that it would work with a dip switch type of opener, and they provided a link to a pdf file (114A5072.pdf) on the Chamberlain web site. So, I entered the link into a browser - took me to the Chamberlain site - but the page stated 404, file not found. I checked VERY carefully to ensure that I had typed the (long) link correctly - and I had (if you doubt me, read on). So, I Googled, and found an older user manual for the KLIK2U-P2. That manual included detailed instructions about how to program it to work with old, dip switch, GDOs. I followed the instructions very carefully. Most importantly, when you are programming the keypad, you have to enter the ID number of your GDO (so the keypad will know what kind of signal it needs to send, to activate the GDO). For my old GDO, that ID number was 11 (note, that has 2 digits). It didn't work. I tried several times, no joy. I did notice two things. First, when programming the keypad, after entering the ID code (11) followed by the pound sign, the lights on the keypad started flashing like crazy - it looked to me like an error signal - the keypad was telling me that I had done something wrong. Second, after I had (supposedly) completed the programming, and tried to activate the GDO, the keypad lit up, but that was all. The GDO did nothing at all. So, just for the hell of it, I decided to try some of the GDO ID codes listed in the instructions that came with the keypad. They listed 9 different GDO IDs, covering a bunch of different types of GDO. Note that those codes were 1 through 9 - all single-digit. When I tried those, I immediately noticed two things. First, during programming, when I entered a single-digit ID code followed by the pound sign, the keypad did NOT start flashing like crazy. Second, after I had completed the programming, and tried to activate the GDO by entering my PIN, the keypad lights blinked very rapidly for about 5 seconds - as if it were sending a signal to the GDO. My GDO didn't activate (presumably because it didn't recognize the signal), but I think that - unlike when I used a 2-digit ID code - the keypad had accepted the programming. So now I called Chamberlain tech support. The person there told me her instructions for the keypad didn't say anything about dip switches, and didn't contain any link to a pdf file. So I emailed her a photo of the instructions that I had received with the keypad, and she confirmed that the link took her to the chamberlain 404 page. So, without any doubt, the instructions that came with the keypad are WRONG. She then googled, and found the same older manual that I had found. We went through the programming several times. No joy. Although she was pleasant, she clearly didn't understand how these things work. First, she got the dip switch instructions wrong (I had to correct her). Then, when I told her that I was calling her from inside my house, she INSISTED that you had to be in the garage when you programmed the keypad to work with dip switches. I told her that, before calling Chamberlain, I had tried to program the keypad several times, some of which were in the garage. And I explained that you had to program the keypad in the garage ONLY if you're using a learn button on the GDO because, in that case, when you press the learn button, the GDO sends a signal that the keypad can detect - so yes, in that case the keypad has to be close by. However, when you're trying to set up the keypad up to work with a dip switch GDO, you do NOT need to be nearby when programming it, because all you are doing is telling the keypad what signal to transmit (obviously, you need to be in range in order to use it!). I told her about the difference in keypad behavior when I used a 1-digit ID code. She refused to even consider the possibility that the keypad would not accept a 2-digit GDO ID code. She kept telling me that the old instructions said that I should use an ID code of 11. I told her that I knew that, and that I'd tried using that code about 3 hours ago, and had used it several times during our 30-minute phone call, and IT DIDN'T WORK. Bottom line is that, as of Jan 2023, the KLIK2U-P2MC does not work with old, "non-learn", dip-switch-only GDOs. I've returned it, and have ordered a different "universal" keypad that - like the KLIK2U-P2 - claims to work with dip switch GDOs. Let's hope that that one works.
A**9
Works Great! Easy to install and setup
I always shut my garage door when I'm out doing yard work, especially when in the back yard, and sometimes it becomes quite the pain to open and shut the door and I usually end up grabbing a remote out of the car. Not anymore! Two screws simply hold this to the outside of the door frame and I can easily open and close it by entering the 4 digit code that I selected! Programming is fairly easy. I couldn't get it to work right away but that was due to me not reading the directions carefully. One note, when installing this MAKE SURE that you have enough clearance on ALL SIDES. The first holes I made mounted the unit too close to the door jam which made it impossible to slide the cover on. So make sure wherever you mount it will allow the cover to fit on ALL sides as well as slide up and off if needed. The keypad lights up red when the buttons are pressed. Great product and you can't beat Amazon's price. This identical product was almost $15 more at the local home improvement store. Only had it for a week so I can't comment on how long it will last. It comes with a 1 year warranty but it's my experience that things like this are usually not worth submitting to the manufacturer for warranty repairs once shipping is factored in. I'll come back here in a year and let you know if it's still working! :)The cover seems very tight to slide up when you first get it, most of that has to do with not having anywhere to really grab it to slide the cover off. Once mounted in place it moves up and down with ease.
D**.
The product arrived in very good time, but I have had no joy at ...
The product arrived in very good time, but I have had no joy at trying to make it compatible with my Chamberlains garage door
G**8
Better than the Chamberlain Keypad
The unit uses a thicker plastic than the original Chamberlain remote. It feels tougher overall. Installation was VERY easy. The instructions were so straight-forward and i had it setup in a couple of minutes. Works flawlessly with my 2009 Chamberlain Whisper Belt Drive which has Security+ 1.0 Pros: - Very easy to setup - Batteries are included! - Thick sturdy plastic compared with original chamberlain Cons: - Like other have stated, the keypad cover can easily come off - so take care with lifting it - doesn't have a separate "enter" button like on the chamberlain - meaning you have numbers 1 thru 9 for your passcode because "0" is used like an enter button Things to note: - After entering your passcode - while the keypad is still lit, pressing any button acts like clicking the button on a remote which i found kind of odd.
U**R
Exelente
Exelente, muy práctico y fácil de instalar.
A**R
Awesome product!
Amazing can’t believe this exists! Had garage door for 10 years and always wanted a keypad but thought I’d have to replace garage door opener itself. This took 1 minute to setup. So easy so fast and works great! Chamberlain Whisper Drive is what I have from 2009. Purple learn button.
T**S
Práctico y buen precio
Fácil de instalar
Trustpilot
1 month ago
5 days ago