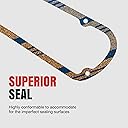
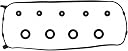
For the weekend mechanic like me, replacing the valve cover gasket is a decently challenging and rewarding task. It was harder than it looked. I will share with you the challenges here and hope it will help you avoid the tough tasks I discovered the hard way. The bottom line is, this is a good product and it worked well for me. The kit includes the gasket, the grommets for the screws and the spark-plug tube seals. A few problems: After 15 years and 220K miles, the old gasket got "cooked" into the groove and hardened into plastic-like substance and refused to come off. Please be careful and don't pry it with sharpened tools. You need the valve cover edge to be smooth to contain the oil in the crank case. I used carburetor cleaner to soften the hardened rubber. It took two full hours, inch by inch to get the old gasket off cleanly. The groove needs to be clean of old gasket or oily dirt for the new gasket to work well. If you don't think you can do that, you can hire someone else to do it because once you start, you will have to finish it or oil will be leaking all over the engine and may cause a fire when you drive a car dripping with oil. Second challenge for this particular car: the old grommets had to be cut out and the new ones forced through a stopper flange built-into the screws. Again, once you cut out the old grommet, the new grommet will have to be forced through the stopper. This was very hard and if you don't want to risk ruining the screw, you can reuse the old grommets in the screws. I reused my original grommets without any problem. The third challenge was the spark plug tube seals. They fit so well in the holes in the valve cover that you risk damaging the cover or the new seal or both. After studying the way they made the seal, I realized that the seal was actually a thin metal "doughnut" coated with rubber for sealing attribute but retaining rigidity. Knowing that, I confidently knocked out the seal from the top down with a blade screw driver (after removing the cover and put it somewhere stable) without damaging the holes in the cover. To fit the new seals in, I placed a piece of wood on top of the seal and a rubber mallet to knock the seal into the hole evenly. The key was to push the entire seal in *evenly*. It fit very tightly and wouldn't go far if it's not even. Do not push the seal with sharp screw driver or tool or you will tear the new seal. You only have 4 seals for 4 holes (for a 4 cylinder car). The gasket appeared to have extra slack around the curve end near the distributor. Don't worry. It is by design and will provide more sealing attribute when pressed. Although the instruction said not to use any RTV sealant, I put a thin thread of "Permatex 82180 Ultra Black Maximum Oil Resistance RTV Silicone Gasket Maker" along the gasket groove (before fitting in the gasket), with extra sealant around the corners where the gasket bent sharply for better sealing. The sealant serves to hold the gasket in place so you can take time to fit your valve cover right side up into the body (with the gasket upside down in the groove). You will need to proceed very slowly, observing the seals around each spark plug tube. They fit tightly to prevent oil to go into the spark plug tubes. I put a thin layer of new motor oil around the rim of the new seal as lubricant for easy fitting. (Remember to wipe the "lubricant oil" after you fit the cover in place.) I used the tip of my finger to feel around the seal to fit down the tube for as far as it would go. Don't force the seal or it may rip. Tighten the screw with the right torque. You will need to google the specs for your car for the order of screw tightening and the torque. The rule is, tighten opposite screws in turn, a little a a time, from the center of the cover outward to either ends. And you don't need to tighten too hard or you will strip the screw. Run the car and check for leaks. If you are careful, it will work perfectly the first time. If all of this is intimidating to you, you are better off hiring someone to do it. It's a lot of work for a simple task. If you take satisfaction to have done a challenging job yourself, you can do it. Good luck.