🌞 Shade in Style, Rain or Shine – Your Outdoor Upgrade Awaits!
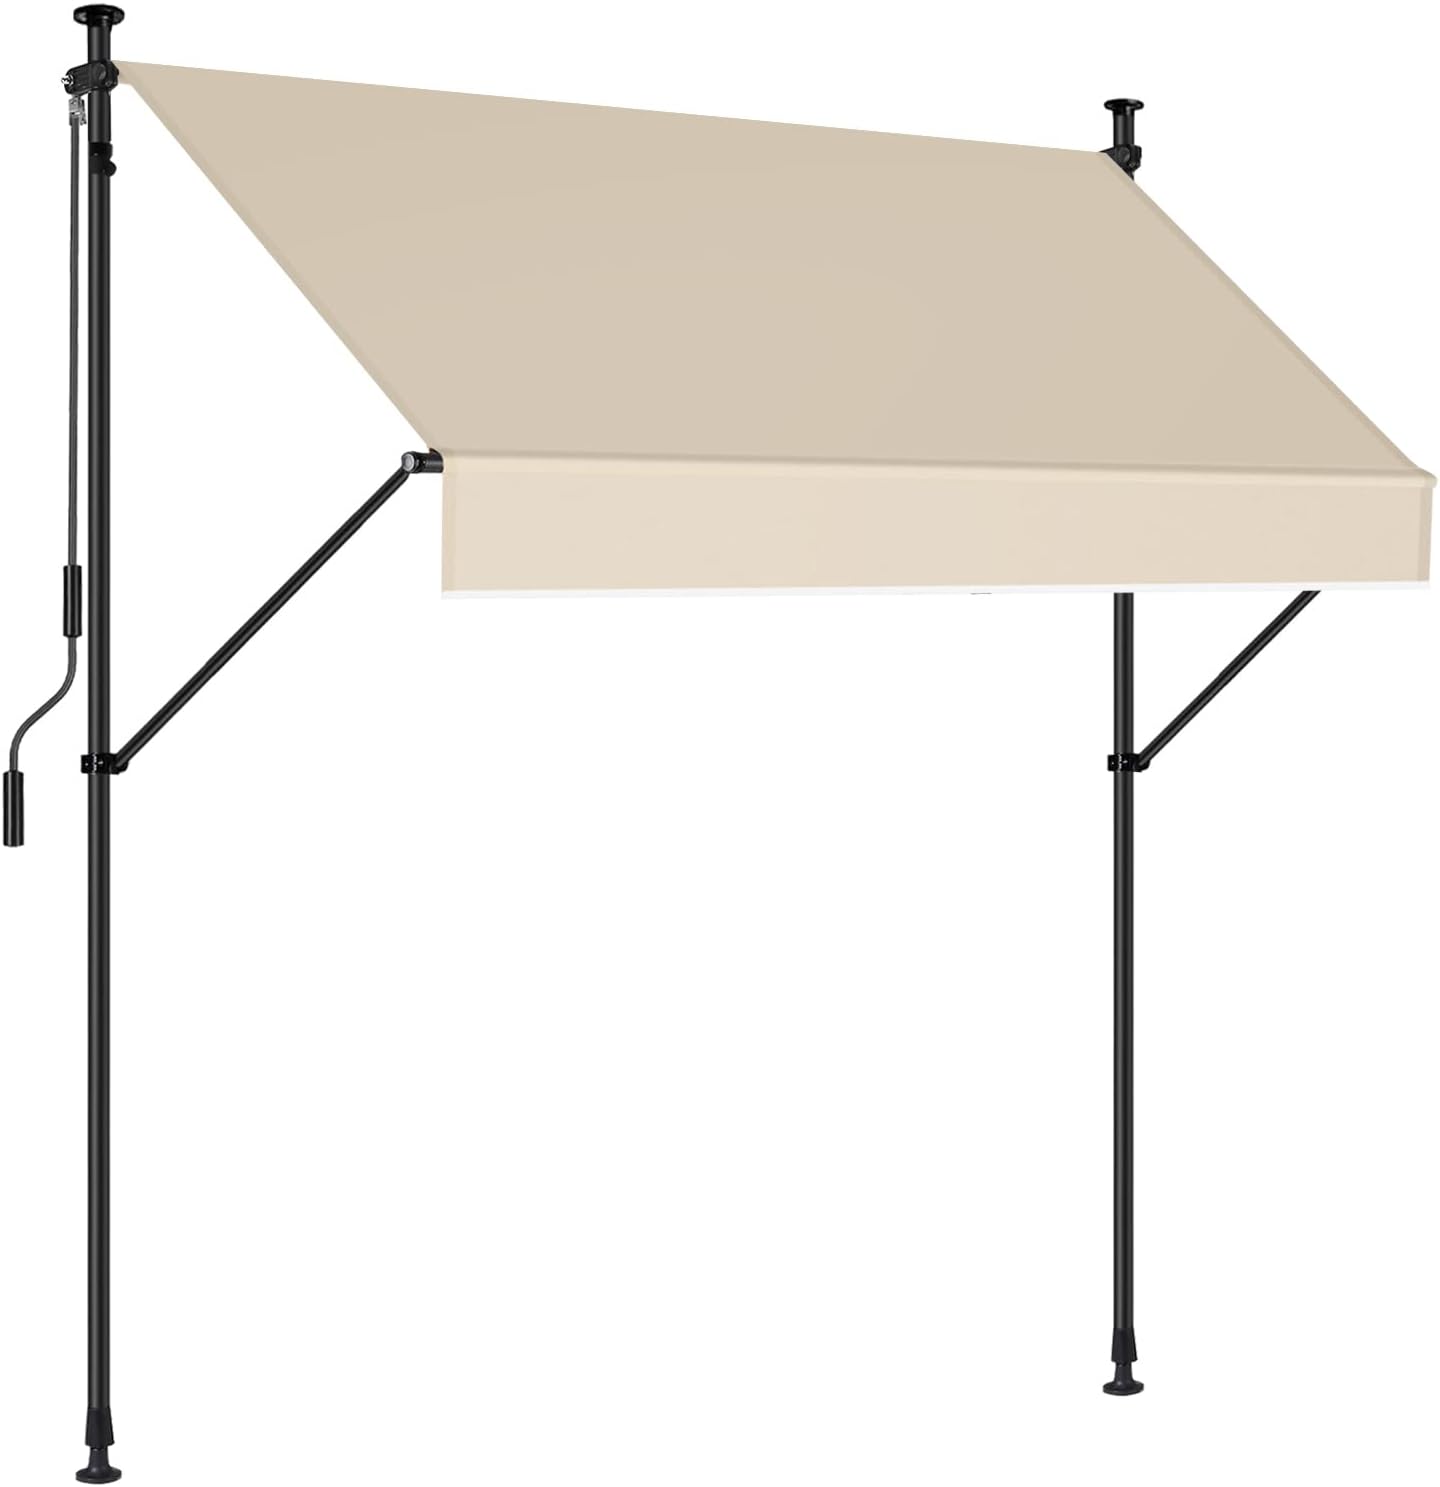
The Jekito Manual Retractable Awning offers a 118-inch wide, all-weather 100% polyester canopy with PU waterproof coating and UPF sun protection. Its durable aluminum alloy rollers and steel frame resist rust and harsh weather, while the smooth manual crank allows easy adjustment of shade coverage. Designed for quick, no-drill installation with adjustable height pillars, this cream-colored awning is ideal for enhancing patios, balconies, and commercial spaces with stylish, reliable sun and rain protection.


| ASIN | B09WMNH17K |
| Best Sellers Rank | #427,905 in Patio, Lawn & Garden ( See Top 100 in Patio, Lawn & Garden ) #364 in Patio Awnings |
| Brand | Jekito |
| Brand Name | Jekito |
| Color | Cream |
| Customer Reviews | 3.7 out of 5 stars 719 Reviews |
| Fabric Type | 100 % Polyester,Polyester |
| Item Dimensions D x W x H | 47"D x 78"W x 118"H |
| Item Type Name | No |
| Manufacturer | Jekito |
| Manufacturer Part Number | Cream 78 |
| Material | Alloy Steel, Polyester |
| Material Type | Alloy Steel, Polyester |
| Minimum Clearance | 90.55 Feet |
| Model Number | Cream 78 |
| Operation Mode | Manual |
| Pattern | Solid |
| Product Dimensions | 47"D x 78"W x 118"H |
| Projection Distance | 78 Inches |
| Required Assembly | Yes |
| Size | 78x47inch |
| Style | Modern |
| Style Name | Modern |
| Unit Count | 1.0 Count |
C**.
Great Awning
I love everything about this product except the assembly instructions. I bought it to keep the blazing afternoon sun from coming into my kitchen. And it is helping tremendously. As for assembly, none of the pieces are labeled and the instructions need to be better. One thing that it did not tell you, is that depending on the side of where you want the handle, determines the direction of how you install the awning material into the bar and what direction you have to roll the material. I had to take everything apart and redo. That was annoying. On a positive, the only part of the assembly that I needed an extra hand with was to lift the awning piece into the two columns. I could have had this up in about 20 minutes if the instructions were clearer and pieces assigned numbers or letters. But after watching a couple of videos from other people's reviews, that is when it all came together, and it took me about an hour to actually complete the assembly. Now that it's up, it is wonderful. It's sturdy and looks beautiful. I do recommend this product highly. Just be warned that the instructions are not exactly clear cut.
K**S
Great for a West Window or just for Privacy
I have a room like an oven and with this beauty installed it is now back to being a usable room. The big window is on the west side of the house and with the sun hitting it the room could not be used because it was so hot. This was easy to install but it did take some reading of the directions. Mine is attached to the house withe brackets at the top just to make it more secure but it would stand without them easily. It will not take a hurricane not will it handle snow but it is very easy to roll in and out as needed. Everything on it besides the width are adjustable so it could pretty much fit any situation. I am disabled and I can handle the two I have installed easily by myself. I will only write good reviews on things that are highly functional and well made. This is the reason for this review.
J**E
The instructions are awful as is the parts list!
First off, once we opened the box, we discovered that this product had been opened, partially put together, stuffed back into the box and then returned to Amazon. Apparently, no one at Amazon bothers to check these things. One part was missing but it isn't even listed on the parts list! We had one but not the other -- It's a small piece that goes over the extension arm on the middle pillar. I guess you can call it the support end cover. Another thing, nowhere does it tell you that the "plastic wire" (part #14) will need to be cut (because it's too long to fit). Also, the cap nuts that go on either end of the awning were two different sizes that required two different wrenches which, by the way, the instructions say you don't need any tools! All in all, I'm not sure I would recommend buying this product.
E**R
Fine awning
This is a clever awning solution. The only, but major, problem was that it arrived with no assembly instructions, nothing but a list of box contents, not even an assembly diagram. Two of the parts were described inaccurately. After considerable wasted time with trial layouts, the actual assembly was easy. Installing is easy with two or more people but is possible for one person with careful planning. It is exactly what was wanted once assembled and installed. No framing or holes in the house required.
M**Y
Good concept in theory...
BREAKDOWN OF INSTRUCTIONS/TIPS ON ASSEMBLY BELOW: My experience: The cloth reel tubes had misaligned screw holes, so I sent this first awning I ordered back and got a replacement. The screw holes on the replacement were still off, but less so than the first and I was able to assemble that time. That said, I never got my awning fully assembled and ended up returning instead of getting another replacement. I experienced many of the same assembly issues a lot of other reviewers did. PROS: -Good potential for renters; you don’t have to damage walls because you don’t need to screw it in to your building -reasonable price for what it is CONS: VERY DIFFICULT TO ASSEMBLE - parts have misaligned screw holes or are improperly sized to fit together without excessive force -poorly written instructions & parts did not have number stickers to correspond with instructions -no official instruction video that I could find ASSEMBLY INSTRUCTIONS: I’m giving my version of the instructions from my experience trying to assemble this awning. Use mine in addition to the official manual. Their illustrations will be needed. BEFORE STARTING: This is a weekend project. Get a Phillips head screwdriver and/or power drill, some DW40 or other lubricant and scissors or a box cutter (optional: work gloves with non-slip grip). Prep a large, unobstructed area to work in. Get at least 1 other person to help, especially on the last few steps. 1) Assemble the awning support rod by fitting posts 6 & 10 together. Many reviewers (myself included) had a lot of trouble with this. I had to use a lot of force and worried I was putting the wrong pieces together. Rest assured, these are the correct pieces, but I suggest using a lubricant if you’re having a hard time (I used vegetable oil). Even then, it will take some effort. 2) Assemble the cloth reel by screwing together posts 11 & 12. Their illustration indicates you need 4 screws, but I only had 2 holes and 2 screws on mine. Instead of the tool they provide, use a regular Phillips screwdriver. If you find the screw holes are misaligned on these (like I did) and you’re having a hard time getting the screws in fully, use a power tool. Just be aware you could strip the screw heads if you do. 3) Insert the support rod and wire into the channels of the awning cloth. The manual includes several notes with this step, which basically say not to push too hard or try to force the rod/wire if they get hung up. Be patient and go slow so you don’t accidentally tear the cloth. IMPORTANT: If you used a lubricant while assembling the support rod like I suggest, make sure to wipe off any excess before putting the rod in so it doesn’t stain the cloth. You may want to let the rod dry overnight to be safe. 4) Unscrew and remove both end caps from the cloth reel. Notice the channel (or groove) running the outside length of the reel. Starting at one end, insert the part of the cloth with the wire in the channel. Gently pull both the cloth and wire through to the other end, until both sides of the cloth line up with both ends of the channel. You may need to trim excess length off the wire. Screw the end caps back on, then roll the cloth up around the reel and set the whole thing aside. 5) Each leg has 3 sections: the bottom posts (18), the middle posts (20) which include the awning arms, and the top posts (17) which have multiple holes for height adjustment. You’ll also need the Hand Rocker (19), the Pipe Clamp (13) and the two Head Covers (5). You might also need lubricant for this step. CAREFUL OF SHARP EDGES. The arms on the middle posts have rubber end covers, but they may not come with the covers on. I needed to put these on myself. Best to do this first before assembling the legs. To assemble the first leg, get one of each of these parts: 18, 20, 17 & 5. Also grab 13. Attach the bottom and middle (18 & 20). Then attach the middle and top (20 & 17). Then, attach the Pipe Clamp (13) on the top. Finish by putting the head cover (5) on the top. For the second leg, use the same parts and steps, except you'll attach the Hand Rocker (19) to the top instead of a pipe clamp. 6) After assembling the legs, position them where you plan to set up the awning and adjust their height. This step is very similar to what you do when you install a horizontal tension rod, like for shower curtains. Use the knobs (3) and butterfly knuts (4) to secure the legs at the desired height. Make sure the legs are spaced the correct width apart and that the pipe clamp (13) and hand rocker (19) are sitting at the same height. 7) Attach the ends of the cloth reel to the hand rocker and pipe clamp by using gaskets (8) and large box nuts (7). Check that the set-up stays steady when you unroll the awning cloth. 8) After fully unrolling the awning cloth, attach the arms (which swing out from the middle section of each leg) to both ends of the support rod using knobs (2). Prop the awning up and check the tension of the cloth. There shouldn’t be any sagging. 9) With the awning fully assembled, make any adjustments as needed, such as the position of the legs in relation to the length of the arms/position of support rod, adjust the position of the hand rocker or pipe clamp as needed, and adjust or tighten the legs as needed, etc. To wrap this review up, please use my instructions in addition to the actual manual, not as a replacement for it. While I did try to provide better wording and description than I feel their manual gives, there are some details in the manual I did not include. Also, as I mentioned, I never got my awning fully assembled, so please take my re-writing of steps 7-9 with a grain of salt.
J**I
Pretty Sweet
I purchased a "used" one that said "looks and functions as new. Damage to box". One end of the box was a little smashed. First thing I did was to use the manual that came with to make sure all the parts were there. Brilliant, it was all there. Then I looked through the diagrams to get a mental picture of how things went together. Hint, throw that combo screw driver/allen wrench thing away. Get your good screw driver out. That was the only tool needed. Followed the pictures. Made perfect sense. Took me two hours but I was doing it all by myself and I took my time so as not to mess up. The hardest part was getting the height right. Too short and you can't tighten it enough. Too tall and you can't fit it in the spot. Fixed one, then the other. Then had the handle on the wrong side. Started over. Finally got it. Some time adjusting the angled bars for the correct drop. Then the door hit it so I had to adjust again. It rolls out much further, but it was windy and I didn't want to roll it out any further today. All in all, it was pretty easy. I've put together much worse. It seems pretty well made. The canvas is pretty stiff which is nice. Rolls up super easy. We'll see how it weather's. But so far so good. Oh...it's on an East facing window and it gets pretty hot on the deck until afternoon. Hopefully this will make it a more usable spot. Did it all without the Hubs knowing anything about it. I will let you know how big a fit he has. Lol UPDATE: Loving this awning!!! I find that I sit on the deck more often because it is so much more comfortable now. The hubs likes it too. He just wanted it to extend out further. The problem was the further out you unroll it the shorter the distance from the awning edge to the ground. This requires you to duck under it. Also, we found we couldn't open the door because it would scrape under the fabric. Luckily I am married to a man who can fix anything. He dug through all that junk we keep because someday it might come in handy. And, ta da, he saved two aluminum extending rods from an old collapsible fish house. They worked perfect (see last 3 pictures) all I have to do is paint them black and you wouldn't know it didn't come that way. Happy Happy 😊
S**6
Too much of a hassle to return
Only reason for 2 stars is the price and quick shipping. Other than that, horrible experience. No instructions, and inventory list is inaccurate. 4 hrs later it's up, and the middle is sagging. The fabric is very thin, but for the price I expected that. Looks like any rain will really be an issue if left fully extended. If I could I would take it apart and return.
C**�
Excellent manual awning easy to install, superior materials and craftsmanship
This is an excellent awning it was easy to install no screw-in installation, is easy to use, is perfect for a patio, balcony, courtyard, porch, deck, etc... it measures 118” x 39”, the height can be adjusted from 7.54’ up to 10.49’. You can absolutely enjoy being outdoors in hot and rainy days under the awning without worry. Is water resistant we have had some rainy days and not a drop on our heads now we can be out in our courtyard under this without getting wet, when is hot it also feels cooler under the canopy. This awning is very well made, excellent materials and workmanship, it takes maybe 25 minutes after you figure it out to install my husband installed by himself. It comes with a hand-crank mechanism which is very easy to use, opens and closes easily in less than a minute. All in all excellent quality, value and amazing item.
Trustpilot
3 weeks ago
1 month ago