


🔒 Elevate your security game with UltraHD clarity and all-weather resilience!
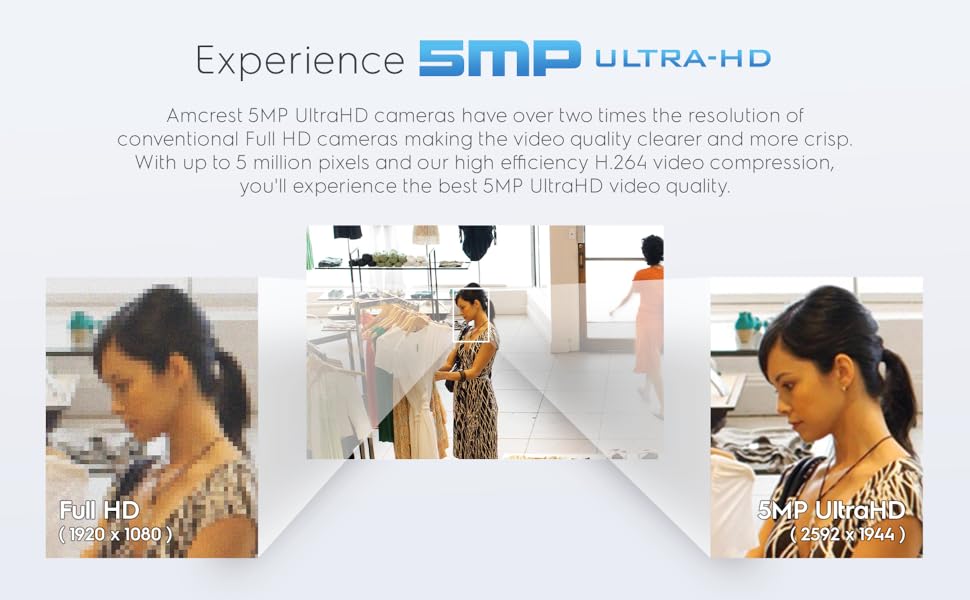
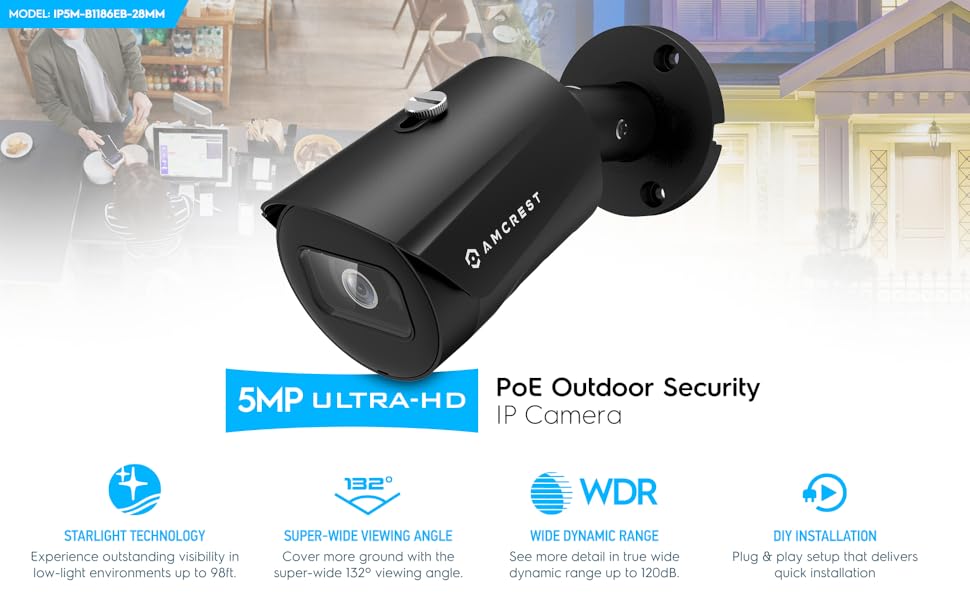
The Amcrest UltraHD 5MP Outdoor POE Camera combines high-resolution 5MP imaging with a durable IP67 waterproof metal body, a wide 103° viewing angle, and powerful 98.4ft infrared night vision. Designed for professional-grade outdoor security, it supports Power over Ethernet for streamlined setup and integrates smoothly with various NVR systems, making it a cost-effective, reliable choice for vigilant property monitoring.








| ASIN | B08K1M34ZQ |
| Alert Type | Motion Only |
| Antenna Location | Business Premises Monitoring, Outdoor Security |
| Batteries are Required | No |
| Best Sellers Rank | 109,600 in Electronics & Photo ( See Top 100 in Electronics & Photo ) 1,078 in Bullet Cameras |
| Brand | Amcrest |
| Colour | White |
| Compatible Devices | Desktop, Smartphone |
| Compatible devices | Desktop, Smartphone |
| Connectivity Protocol | Ethernet |
| Connectivity technology | Wired |
| Control Method | App |
| Controller Type | App |
| Customer Reviews | 4.3 out of 5 stars 857 Reviews |
| Effective Still Resolution | 5 MP |
| Effective Video Resolution | 1944 Pixels |
| Form Factor | Bullet |
| Global Trade Identification Number | 00850011990919 |
| Included Components | Quick Start Guide |
| Indoor Outdoor Usage | Outdoor |
| Indoor/Outdoor usage | Outdoor |
| Item Dimensions | 16.5 x 7 x 7 centimetres |
| Item Weight | 1.28 Pounds |
| Light Source | Infrared |
| Material | Metal |
| Model Number | IP5M-B1186EW-28MM |
| Mount Type | Wall Mount |
| Network Connectivity Technology | Wired |
| Night Vision | Night Color |
| Number of Channels | 1 |
| Number of IR LEDs | 1 |
| Number of Items | 1 |
| Other Special Features of the Product | Night Vision |
| Photo Sensor Technology | CMOS |
| Power source | Corded Electric |
| Rear Webcam Resolution | 5 MP |
| Recommended uses for product | Business Premises Monitoring, Outdoor Security |
| Room Type | Office |
| Special feature | Night Vision |
| UPC | 850011990919 850007530785 |
| Unit Count | 1.0 count |
| Video Capture Format | MP4 |
| Video Capture Resolution | 5 MP |
| Voltage | 12 Volts |
| Waterproof Rating | IP67 |
| Wattage | 6 watts |
| Zoom Type | Optical Zoom |
L**E
Solid choice
Solidly built, good picture, metal construction, integrates well with the Amcrest NVR but works with anything, even solo. The internal interface is solid and modern with a LOT of configuration options. I've begun using Amcrest exclusively for my properties.
I**R
Initial impressions: Seems solid and I did get it to work (sort of) with an AvertX NVR.
These are my initial thoughts after getting it setup and working with my NVR (PorConnect A800+), but not installed. I got this camera to replace an AvertX camera that bit the dust after a disappointing short almost 6 years in use. The AvertX system from Costco came with 4K HD POE cameras (8MP). This system has been great, but in the last year 2 of the cameras have died and one more seems a bit on the way out. The replacement cameras from AvertX are $280. So, I hadn’t replaced those cameras immediately until I looked into my choices as I wasn’t really eager to spend $600 for three cameras. This camera feels real solid as far as weight goes, equivalent to the AvertX cameras that came with my system. The camera housing is metal. The mount is plastic. A couple things to note, that I have discovered as part of setting this up in my house for later installation outdoors: 1. This is not a 4K camera and the ratio is different. The ratio with my Avertx cameras is 16:9 (3840 x 2160) like true HD. This camera is 4:3 (2592 x 1944). 2. It is a little tricky to get the password changed. The AvertX software would not connect directly to the camera. I had to connect the camera Ethernet cable to my switch and then power the power injector dongle with a 30-year-old wall wart Radio Shack AC Adapter (Cat No 273-1662) set to 12V that had multiple connectors one of which actually fit the dongle. With that setup, I was able to use the Amcrest recommended network config tool (Amcrest_ConfigTool_Eng_V3.20.10.T.180715) to get the IP address of the camera and put that in my Chrome browser to directly connect to it. Once this was accomplished, I could actually change the default user ID and password. There are a lot of other settings in there as well, many of which are not accessible from within my AvertX user interface to the camera. 3. Since this is not an AvertX camera, it appears I do not have the ability to change many of the settings of the camera using their software. See the pictures showing what is available with the AvertX camera vs. the Amcrest camera. Also, note that the AvertX camera capture has a Connect Directly to Camera link while the Amcrest does not. 4. So far, I have not been able to figure out how to connect directly to the Amcrest camera while it is connected to my AvertX NVR. I have not tried any of the phone apps that Amcrest mentions in their documentation. So far, I have had to do the process in #2 to connect directly. For an almost $250 price savings (after taxes) over the AvertX camera, I am happy so far. It looks like I am giving up some setup conveniences for that savings and we’ll only know if it is worth it once 5 or 6 years have elapsed, to see if this one lasts as long. There are 4 AvertX cameras left and one of those has already changed as far as video quality goes. It may be on its last legs although the first two to die just quit without warning. The Phoenix desert heat has got to be brutal on these things. If this one works out over the next few months, I will probably feel more comfortable splurging for the Amcrest 4K version of this one (IP8M-2496EW-AI-V3) which seems to be regularly priced at about $100. I’ll update this review with my longer term findings after a few months.
C**1
UPDATE: Best Bang for Your Buck
UPDATE2: I have upgraded my review to 4 stars based on having them in operation for a month. I am thus far very happy with the performance of these cameras, the image width, depth of field and clarity earn high marks for a reasonably priced camera. After I discovered how to manipulate the mount so I can point the camera where I wanted things went smoothly. Originally I thought the lens hood was too short but it seems to work well enough although I still think they should lengthen the adjustment another half inch. My install was very detailed and time consuming because I wanted to make this clean and maintenance free, I used quality solid copper cabling and PoE switch, made sure there was no exposed wires and am testing out open source NVR software to complete the setup. Amcrest has a good tool for installing or configuring the cameras (Amcrest IPconfig) but I would like to see them update their surveillance software and include various methods for configuring access via the web in addition to any of the paid subscriptions model they might have or come up with. In short this project has been fun, I still have 2 more cameras to install but am sure that will go just as smooth as the others, just be sure to use good wire and PoE switch. I posted a pic to show how it looks installed, they arent obvious at first glance, it took my neighbor a while to notice they were there and they werent too pleased which was the cherry on the cake for me. UPDATE: Prior to returning these I sat down and gave these a good looking over to see if I could use them as planned. Well after a little investigation I found that if you do the following you can gain greater flexibility on camera positioning. 1. Remove the set screw from the white sleeve (attaches base to camera ball) be sure to hold the camera head as it will get real loose 2. Slide the white sleeve towards the camera, you will need to manipulate the camera so that the sleeve has max extension 3. Once you have done that you will notice the base rotates (you may hear or feel clicking) 4. Adjust base to the required position then slide sleeve back to original position and insert set screw 5. The sleeve has a rubber gasket which you may or may not see depending on amount of travel of the sleeve, just make sure when putting back together the gasket is in place 6. Now install camera and make your final adjustments and tighten set screw I bumped the rating up 1 star because I feel so far that the camera appears well made but the lack of instruction on how to fine tune positioning is not documented (or that I could find) and was a cause of frustration and wasted time looking for alternatives. First the bad: 1. Unless you are planning on putting this camera dead square on your target area dont expect any level of adjustment other than up and down (maybe). If you are planning placement at a location off center from your monitoring area the ball mount DOES NOT allow for horizontal and vertical alignment to center up your viewing area so you will have blind spots. 2. If you have to manipulate the orientation to get the correct adjustment you run the risk of having the cable chase within the ball joint pointing up which would allow for rain and snow to collect and make its way into the unit or mounting box. 3. The cutout in the base to accommodate the cable also limits the position in which this can be placed. Again if you align the slot in any position other than down you will most certainly get water and snow into your camera or junction box. 4. The sun shield is way to shallow, its next to useless. 5. These do not connect at gigabit speeds which means each port on my costly GB switch which these would connect would be a waste of resources. I suspect part of the video lag is a result of slow line speed. The good: 1. If you are one of the few who are lucky enough to be able to place the unit dead center on to your target area without adjustment consider yourself fortunate. 2. The units are heavy and constructed of metal and SEEM to be made well. 3. I only powered up one camera before realizing the poor design quality noted above but the picture seemed clear BUT with a noticeable lag.
R**Y
Great Bullet Camera
This camera is very solidly built. It was much heavier than I expected in a good way. Really appreciate the SD door. I did utilize the SD slot with a 64GB card. While I was fortunate to be installing the card pre camera install, I really do appreciate the screws with preventing fallout backing and the lanyard attached to the SD/Reset button access. There have been several times where I would need to make a change after the camera was installed and losing a screw or a cover would be horrific. With this foresight though, it is not a concern I have. While I do prefer turrets to bullets, the area I wanted to cover, this made more sense. Connecting to the camera once on the network was very quick and simple. Adjustments like IP, time, etc. were simple and easy to find. After getting its new IP, formatting the SD card and all other adjustments I brought it into my Blue Iris. This too was rather quick and displayed almost instantly. I also utilized the sub stream for my motion and the main stream for recording. The image was amazing and the night vision made the view very clear. Compared to my other Amcrest cameras (IP5M-T1179EW-28MM) this gave me an equally great image. Overall, I really like this camera and it has a permanent spot outside unless the spiders get too interested, then it will move indoors. Things I really liked: Video quality Night vision (No supplemental needed) Solid construction POE SD/reset button Door Access to the camera directly works well through Chrome and Firefox. No need for IE, plugins, etc. GUI was very user friendly Things I wish were a bit different: More available sun-shield adjustment
H**N
Great camera at a great price!
My first impressions opening the box were good. The actual device feels solid and of good quality. It feels well made. The mounting bracket and the camera unit are made of metal. It came with some small papers for getting started as well as a reminder to change the default password (good to see this suggested right away for security). Mounting hardware was included as well as a waterproof enclosure for the ethernet plug. There are a few options for how you can set it up depending on your needs. I wanted to use it with my existing 3rd party app so I did a manual setup. I logged into the web interface, was prompted to set a new password for security purposes (good on them for forcing this), and was immediately shown a realtime live view of the camera. The web interface is an insane upgrade from my previous cameras that required Windows and Internet Explorer. It's clean, fast, and works with modern browsers cross-platform. I was especially impressed with how low-latency the video is. From other reviews I read I was hopeful for good video quality but I was pretty blown away. It's completely dark out yet this thing's sensor is sensitive enough to be lit up enough to look like it's dawn. With a little bit of light pollution bouncing off some clouds tonight it's able to operate at night in full color. When it's even darker its night vision infrared lights illuminate the area really well, much better than my older cameras. I've attached a comparison picture of my old vs this new camera, installed just a couple feet apart, taken at the same time tonight. About 15 minutes later it got a little darker and it switched to nightvision mode (also shown). The nightvision is so sharp and bright too. Overall I'm pretty impressed by the quality I got for a great price. Both the hardware and software are well beyond my other cameras. I'm probably going to be replacing a bunch of cameras soon and this camera and/or the 4K version are my top contenders most likely. I'm very happy with this so far.
Trustpilot
2 weeks ago
1 month ago