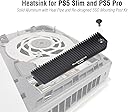
I struggled to find some meaty heatsinks that would fit the PS5 slim and did have to return some that promised but did not deliver. This one did the job perfectly. However, full disclosure – I ran the SSD for 6 months without any heatsink (not recommended) before this and I cannot tell the difference since fitting it. Furthermore, I fitted 2x £3.50 heat sinks in friends PS5 slims (twin pack for £7), we all have the same SSDs and there doesn’t seem to be any performance difference, so maybe don’t feel like you have to blow big bucks on a heatsink. It is an expensive part, but I don’t have any regrets buying it. A few pieces of advice if you do get this: 1. Follow the video that is posted with the Amazon page description and provided by the seller. It is very much step by step. 2. The screwdriver supplied has a protective cap which can be disposed of, but there is also a small plastic washer behind this cap – don’t throw this out as it is needed (though not strictly necessary) to clamp down the heatsink that replaces the metal SSD cover. 3. I would recommend leaving the plastic film on the thermal pads for the base plate…bear with me…. Pop in the base plate and the thickest thermal pad. If the SSD doesn’t easily lie flat (to the riser post), go to the next thinner pad until you feel a little resistance to get it to go flat. This way, you know you will have good thermal contact. I had the thicker grey one at the bottom and blue on top. This may vary between models. When you find the right one, start the procedure….and remember to remove the film when needed! 4. For some reason the grey thermal pads are sectioned into squares, peeling the first film layer to put it into place was fine, but when you remove the next layer from end to end, the squares start lifting. I found that using tweezers and peeling one corner and working along the longer edge made it a little less likely to lift the pads. Why it wasn’t one strip was beyond me. 5. The tiny pink thermal pad is designed to sit inside a little indentation of the main heatsink, check they line up before clamping down. 6. You are not told to, but you will need to remove 2 fan screws to fix the last heatsink (torx screwdriver provided). Make sure you keep them in the right order as they are different sizes (on my model they were). 7. There is a pouch of thermal grease to be used at the end (heatsink to fan). If by chance you are left with the thinnest thermal pads, you can use these for a lot less mess. This is where being in squares does help as you can place them in an arc to fit the shape of the heatsink. It didn’t take too long to do this and with the exception of tweezers (helpful, but not necessary), all the parts and tools you need are supplied. The heat sink really looks the part and as it acts as the SSD cover, you get the dust protection whilst also getting air circulating over it (as opposed to being trapped inside the coffin of the SSD slot). Does it work – yes and fits perfectly. Is it good value for money – £ for £ compared to the cheaper ones I fitted – no Does it look the part – heck yes, but you won’t see it :D