
DOWNLOAD THE APP


Customer Services
Copyright © 2025 Desertcart Holdings Limited
DOWNLOAD THE APP

🔥 Upgrade to endless hot water and energy savings—because your home deserves the best!
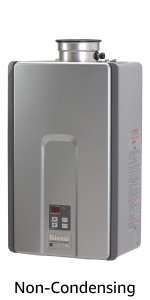
The Rinnai V53DeN is a high-efficiency natural gas tankless water heater delivering 5.3 gallons per minute of continuous hot water. Designed for outdoor wall-mount installation, it supports up to four appliances simultaneously while conserving energy by heating water only when needed. Compact and durable, it features a 10-year warranty on the heat exchanger and advanced technology for long-lasting, low-maintenance operation—ideal for energy-conscious homeowners seeking reliable comfort.


| ASIN | B07MH3C76M |
| Batteries Required? | No |
| Best Sellers Rank | #72,343 in Tools & Home Improvement ( See Top 100 in Tools & Home Improvement ) #99 in Water Heaters |
| Brand | Rinnai |
| Color | Euro White |
| Customer Reviews | 4.4 4.4 out of 5 stars (2,803) |
| Date First Available | December 27, 2018 |
| Efficiency | 0.82 |
| Finish | V53DeN - Natural Gas/5.3 GPM |
| Global Trade Identification Number | 00766156011795 |
| Heat Output | 81 Kilowatts |
| Included Components | Water Heater |
| Is Electric | No |
| Item Depth | 7.9 in / (202 mm) |
| Item Package Quantity | 1 |
| Item Weight | 33 pounds |
| Item model number | V53DeN |
| Manufacturer | Rinnai |
| Maximum Flow Rate | 5.3 Gallons Per Minute |
| Maximum Temperature | 140 Degrees Fahrenheit |
| Measurement System | Metric |
| Mounting Type | Wall |
| Part Number | V53DeN |
| Pattern | Heater |
| Product Dimensions | 18 x 18 x 31.2 inches |
| Size | 5.3 GPM |
| UPC | 766156011795 |
| Voltage | 120 Volts |
| Warranty Description | Residential Factory Warranty - 120 months (heat exchanger), 12 months (labor), 60 months (parts) |
| Wattage | 81000 watts |
E**N
Amazing Product
I've waited nearly 2 months before I wrote a review. Here's my summary: 1. The installation is easy if you are replacing an existing unit, I replaced dual tank water heaters and relocated the tankless heater closer to the majority of the water users in the house so the installation was more time consuming and difficult. The instruction manual is awesome, take the time and read thru it (prior to buying) and follow it strictly. I bought a gas fired unit, had the gas company come out and validate the inlet pressure and ran all the calculations recommended. Installation took 4 days since I had to run additional gas piping, extend hot and cold water lines and install the vent piping to the exterior. 2. After you've read the manual, plan your installation carefully (vent, water in, water out, gas piping in, power). These all converge around the unit which isn't large and will take planning to make it fit and functional. Purchase all the vent pipe ($$$), water piping, gas piping, and valves for the unit (the bundle of all of these are not inexpensive) 3. The unit fired up after the second try (it had to vent the air out of the gas line on the first attempt). The start up was very easy. 4. My wife likes HOT water, the unit is delivered with a maximum of 120 degree output. I queried the internet and found the program button sequence to get it to 140 degrees. It worked instantly, but after an hour the unit reset back to 120 degrees and the process wouldn't let me place it back to 140 degrees. I called the service desk and gave my number for a call back. 30 minutes later, the call came in. The service tech asked a few questions so she knew which unit I had purchased and then I communicated to her what I had experienced. She told me that the code I had used was for a different unit and she directed me step by step how to program the unit. (I had the panel open and performed as she told me each step). It took 30 seconds and the unit has worked correctly ever since. 5. The closer the unit is to the usage point the faster the water heats up, so don't have expectations that you'll get instantaneous hot water when there is 20+ feet of cold water in the pipe that has to be pushed out by the hot water, but it does heat the water extremely fast and it's on the way as soon as you open the hot water faucet!
N**N
Very good unit. Tricky install. Need special vent pipes, not your old ones.
The piping that, in my case went up through the crawl space, then through the roof was tricky to install. Ordered all new pipe after measuring carefully and cataloging the fittings I'd need (45's, 90's, and so on). Make sure to order the right diameter double-walled pipe. Look online. I ordered online and the company actually shipped the same day, and it came the next, which is nice if, like me, you are without hot water in the interim. S. Brewer's review is excellent. He covers all the crucial points very well. He explains clearly what you will be faced with if you decide to DIY the job. It was challenging. When you get to the point of lifting the unit up to hang it on the wall while simultaneously marrying it to the vent pipe, a second set of hands would be a major plus. I did it myself, but a second set of hands would be real boon at that point. I was able to use the existing hole in the roof, but, as it turned out, the contractor who built the house preferred to cut a gigundo hole in the roof instead of doing the geometry to accurately predict the penetration location and hole size. To compensate, I created a plywood insert with a proper hole cut into it, pre-drilled the screw holes, and then used light cord to pull the "mask" up from above, up on the roof. Once I had it placed properly, I used a right-angle drill to drive in the screws from underneath. Don't forget that you'll need a flashing unit on the roof to make a good waterproof seal, and also some roofing tar to further seal it. Be careful when lifting the shingles to slip the flashing unit under them to avoid breaking them. If you do some minor damage to the surrounding shingles, use the roofing tar to compensate. Once installed, the unit works very nicely with the caveat that it does not seem possible to set the temperature above 120°F. That's really sufficient, but my old unit was set at 125°F. Not a deal breaker. If you've not had an on-demand heater before, be aware that when running hot water, there's a lag before you actually get hot water. With this unit about 20' from the kitchen sink, that's about 30-45 seconds before the water warms up. Overall, very happy to have hot water again, and this unit outperforms the previous, larger capacity unit it replaced. Install a phosphor filter upstream from the unit to reduce maintenance flushing. Do install the valve set that will later permit de-scaling the boiler tank. This is important for the longevity of the installation. TIP: use the woven steel, flexible pipes to connect the unit to gas, inlet, and outlet pipes. These are much easier to work with than their copper counterparts, which are hard to bend-- MUCH easier. Good luck. If you prepare well ahead of actually doing the job, you will greatly reduce the stress factor in carrying out the actual installation. Do your homework. YouTube is your friend. ... and DO read S. Brewer's excellently written and potentially very helpful exposition on the entire process of installing these units. p.s. If you need hot water in a hurry at your taps, you'll want to spend the extra spondoolix for the unit with a recirculating pump: it's a luxury, but if you prefer faster delivery of hot water to your taps, you'll want that version of the heater. Cheers, N.
C**.
Durable if you maintain it
Installed this in November 2018. Been hassle free, working perfectly since then. Love the endless hot water, and being able to refill the hot tub with hot water is great. We have extra hard water, so I flush it with 3 gallons of pure food grade vinegar every 6 months. This is critical, but also really easy, once you set up isolation valves and get a good little pump and a 5 gallon bucket. I flush with the heat on, set to lowest temp, only takes 20 min to run clear. New instructions say to run it cold with heat off, last unit we had in 2001 said to let it heat the vinegar for faster cleaning. Not an easy DIY install, especially the gas line upgrade. I had to run 60ft of 1 inch gas line at the last house, was a difficult job. Many cities don't allow homeowner gas line work, I got lucky and was able to get permits in 2 cities over the years. Vent kit install was fairly easy, out a side wall, cut a big hole in the wood rim joist. Needed to drill and saws all through 6 inches of wood, took a while, but pretty basic. You need to do a lot of planning and make sure your vent is not too close to a window. Check with your city first to learn their requirements, they can vary a bit. Lots of plumbing had to be moved/replaced, as we moved the location about 8 ft away from the old one. Even with all the work, the payoff is worth it. Endless hot water, lower gas bill, and about an extra closet of floor space gained. That was huge in a small living space.
G**A
Definitivamente el mejor calentador de agua que he tenido, silencioso, ahorrativo, calienta el agua excelente, definitivamente lo recomiendo, de hecho ya lo he recomendado a varios de mis clientes, soy arquitecto y estoy feliz con mi calentador
Z**S
Been using this for 4 months now, couldn't be happier with it. Was told by a plumber to make sure you get the bypass valves so you can descale it every 6 months or so.
T**R
we bought this tankless hot water heater to replace the eccotemp we bought the heat exchanger leaked after a year this tank is so much better the pilefiter had it up and running in three hours from the box I love it so much I am buying another one for our RV great value
B**.
Bought this unit in replacement for the 10 year old R53C unit I had. Very happy, more flow then the old one and no issues with low flow taps not kicking in the hot water heater. Also no issues with running multiple devices of hot water at the same time, just a slight pressure change but not cold or hot shock in the shower tub etc. Would recommend to anyone, very impressed with the speed of shipping.
G**N
GOT A GOOD DEAL...$280 CND SO UNLESS ITS BROKE I GOT A GREAT DEAL..HAVNT USED IT YET BUT TOOK IT OUT OF THE MANUFACTURERS BOX AND GAVE IT A GOOD VISUAL INSPECTION..NOTHING WRONG I CAN SEE..PACKED REALLY GOOD
Trustpilot
2 weeks ago
2 weeks ago