Description
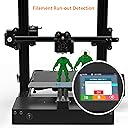
XVICO X3 Pro 3D Printers DIY Kit Aluminum Printing Machine with Filament Run Out Detection Sensor and Resume Print Metal Base Desktop 3D Printer UL Power for Home and School 200x200x250mm, Black: desertcart.com: Industrial & Scientific
Review: Beats the expectation with good quality print.... - Ordering: Seamless with desertcart Delivery Time: Prompt delivery with prime Delivery Packaging: Nicely packaged in a box with bubble filler to limit damage to the product. No visible dents or damages to the delivered box. Product Packaging: Unit itself is packaged nicely with enough padding with partitions for parts. Screws were nicely packaged in zip lock bags and identified with size. Assembly manual was nice, small color printed booklet. Missing Items: Missing A19 screw packet. Not a big issue for me as they had a spare screw in the extras bag and I took that to the hardware store to match to get 3 more of those to finish up the assembly. Assembly Instruction: • Included: Kudos to the provided assembly instruction as lot of times it is difficult to clearly read and follow but that is not the case on this one • Not Included: One thing if I add to the assembly instruction would be how to remove the glass bed as it is not clear what section slides out if its your first printer • Not Included: Highly recommend if they provide some sort of assembly instruction or link for a video on the touchscreen for operating procedure Assembly: • All the components went together very well and didn’t take guess work or have to fight to make it fit • Before tightening the motor spindle assembly, try to spin the shaft manually by rotating it and make sure you can raise the z-axis all the way to the top. If the assembly is tightened little sideways, then as print head goes up on the z-axis, it might see more friction on the spindle and cause drag that might affect the performance • Need to take bed out to finish up the belt assembly, clear instruction for this would have been more helpful • All the limit switches went in place without a concern, only thing there is no room to make adjustment and I will talk about that later why we may need that adjustment • Spool holder is just a flat bar bent to shape and had concern if spool will roll smoothly but worked without any issues • All the wires are tied to the frame with provided zip ties but you have to come up with a strategy so that it has enough play to accommodate the table movement in all 3 direction, not clear on picture in the instruction Performance: • Provided power to the unit and went through touchscreen to move it to home position. It took some time to figure out each icon on touchscreen as no instruction provided for operating procedure. • As soon as it hit the x-axis limit switch it started making loud stuttering noise for about at least 2 seconds. Problem is travel bottomed out on the x-axis and limit switch is still not closed and its not much maybe about 1 to 1.5 mm. So I stuck a small piece of foam tape on the limit switch lever and that took care of the problem. So that is why I mentioned we need some adjustment for the switch especially x-axis • There is nice feature bed leveling option to level you bed. This is a very cool feature for leveling the bed. Again well thought out option to be included • I currently have Ender 3 printer and its very intuitive to go through the screen as each line item is word description, so you know what it does when you select that option. Touchscreen is a step up for Xvico but it can be pain for some people if they are not tech savvy • Selected a sample model and used Cura to slice and loaded that file on the provided micro SD card and inserted in the slot on the machine • Loaded spool on the bracket and comes the fun part of inserting the filament end through the feeder. Went OK through the sensor but stuck at the feeder end, loosened nut with spring to pull out the bracket to help guide the filament go thought the tube. By doing this you can at least use a pin or small screw driver to help guide in to the hole while you push the filament • Once filament is in place, selected the model to be printed from the touchscreen menu, once model is selected it goes to the main screen and waits for the temperature to come up. There is a default settings of 50 degrees for the bed and the unit doesn’t have a heated bed, so you have to change that to 0 otherwise it is simply waiting doing nothing. Once extruder temperature reaches set point, printing starts its job • See my list of concerns or problems I encountered with Xvico when attempted to print • Eventually I had my model printed Problems or Concerns: • It does take over 6 minutes for extruder head to reach set temperature of 200 degrees. Bed temperature has to be set to 0 otherwise printer won’t start • First attempt to print right on the glass bed didn’t work, extruded filament didn’t stick on to the bed • I wondered why they provided a glue stick in the accessories and its use is to provide thin layer of glue coat over the glass bed for adhesion, had to search in the web and its one of the trick in 3D printing world • Tried with applying a layer of glue coat on the bed, same result didn’t stick long enough to complete the model • Tried the painter’s tape trick, applied a layer of Frogtape and tried printing again, no issues. • I compared the same print model that was printed on Ender 3 vs Xvico, here are some concerns • When extrusion head travelled between 2 walls or if you are printing 2 objects at the same time where it travels, it left a thin string trial and it eventually builds along with the model, see pictures for what I’m referring. This didn’t happen with Ender 3, so this is something to do with the internal software or firmware on the printer, hope manufacturer will look into this. You can easily clean up extra string. Little rub takes care of it. • When comparing model printed on Ender 3 vs Xvico, model from Ender 3 looked slightly better on the appearance compared to Xvico print. If I have to give a rating on a scale of 10 for model appearance, I would give 8.5 vs 10 against Ender 3. • On some occasion, instead or doing a dry pass before start printing the model, it would go straight to start printing the model and that is not good as extruder is not stable yet, I can’t say for sure why this happens • The filament feeder is making some noise as gear reverses to slow filament during transfer and it makes you think something is wrong, doesn’t happen all the time • Overall I tried printing 3 models that took over each 15 hours and it turned out good maybe not 100% but definitely better than most printed samples I have seen Pros: • Glass bed for consistency, minimal wear • Bed slides out easily for removing model and cleaning • No heated bed, so lower power consumption • Touchscreen Cons: • No heated bed, have to use glue or tape for adhesion • Unwanted strings • Sometimes have to restart the process as no filament is extruded Conclusion: For this price point, Xvico does perform and produce good 3D printed model. Has to give credit to the manufacturer for bringing this printer to the market. Has a very good potential to compete with name brand printers that is already out in the market
Review: Doesn't work - I got it, assembled it correctly, but one of the motors spun the wrong way. I tried contacting the company but there's literally NO way to get into contact with them, their website gives you 3 different phone numbers and 2 different emails, all of which don't connect to anyone. I've heard that this is a good 3D printer for your money, the quality doesn't look bad, so I fixed the wiring (just swapped 2 wires on the motor control) so now it spins the correct way, but now it won't print. I wish I could get into contact with the manufacturer to sort things out, I'm probably going to just return it and get an EnderPro 3, it's about $20 more, and I know it's definitely reliable and has people I can contact