We remain fully operational. Our teams are working around the clock to ensure your deliveries continue safely.

DOWNLOAD THE APP


Customer Services
Copyright © 2025 Desertcart Holdings Limited
DOWNLOAD THE APP

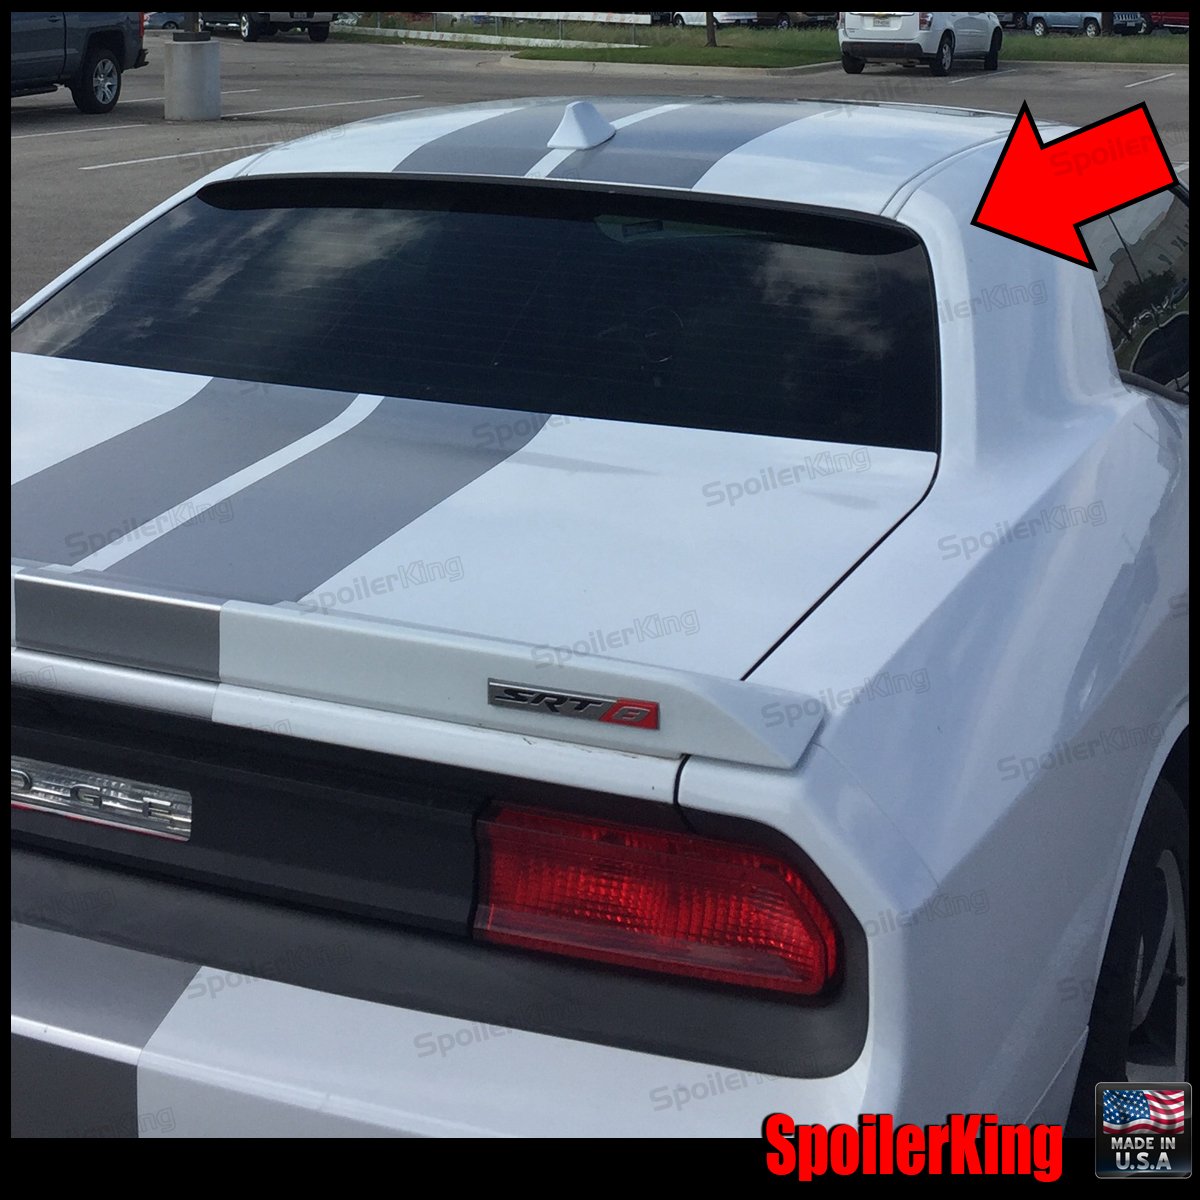
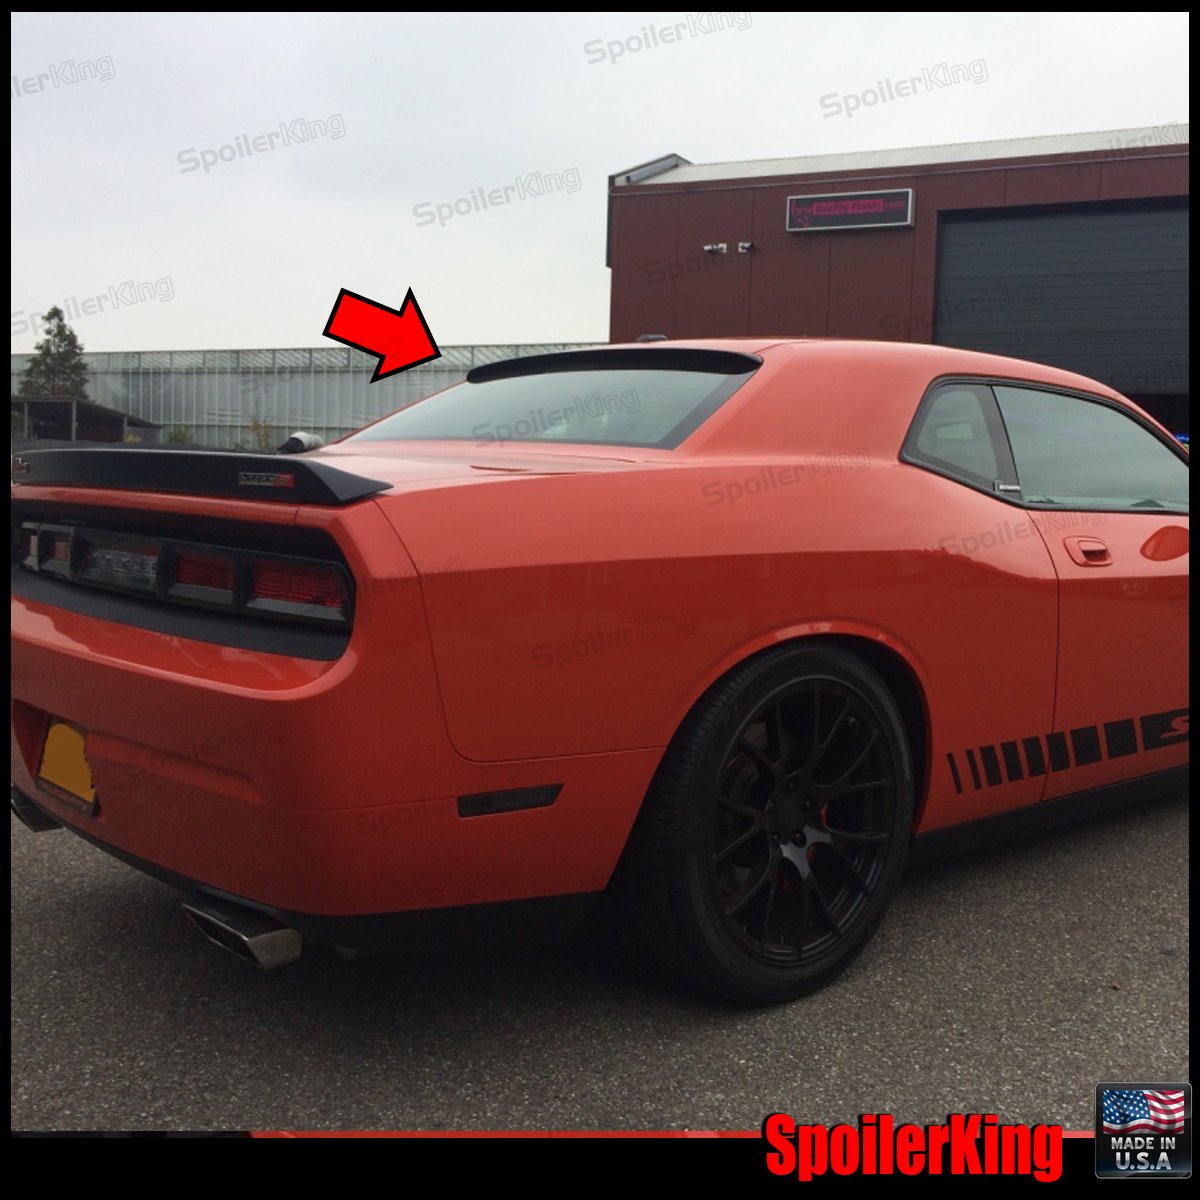

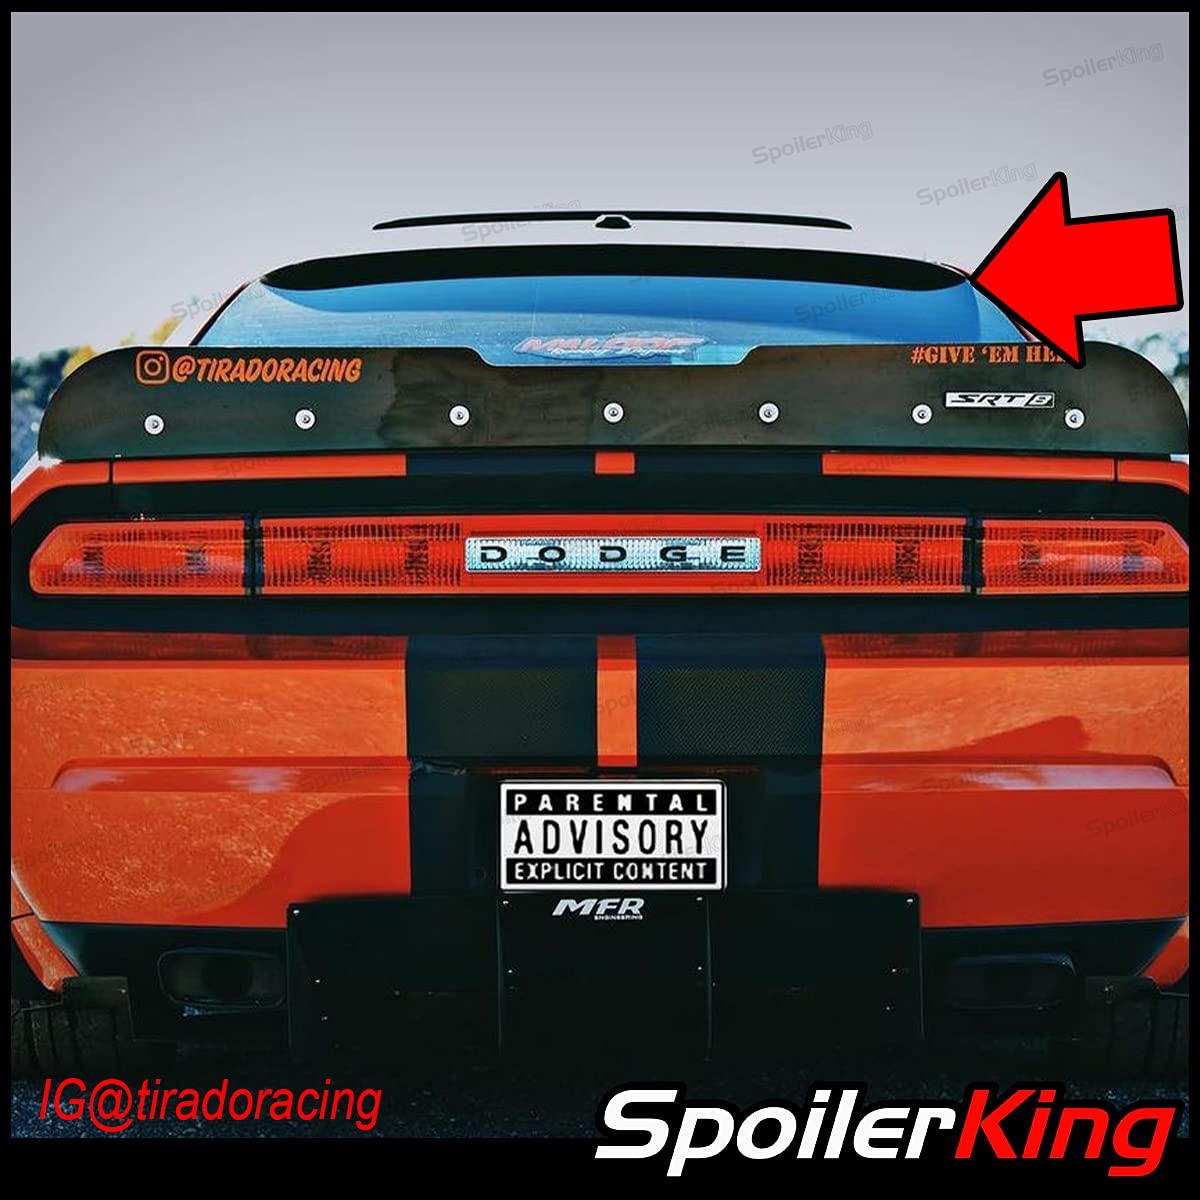
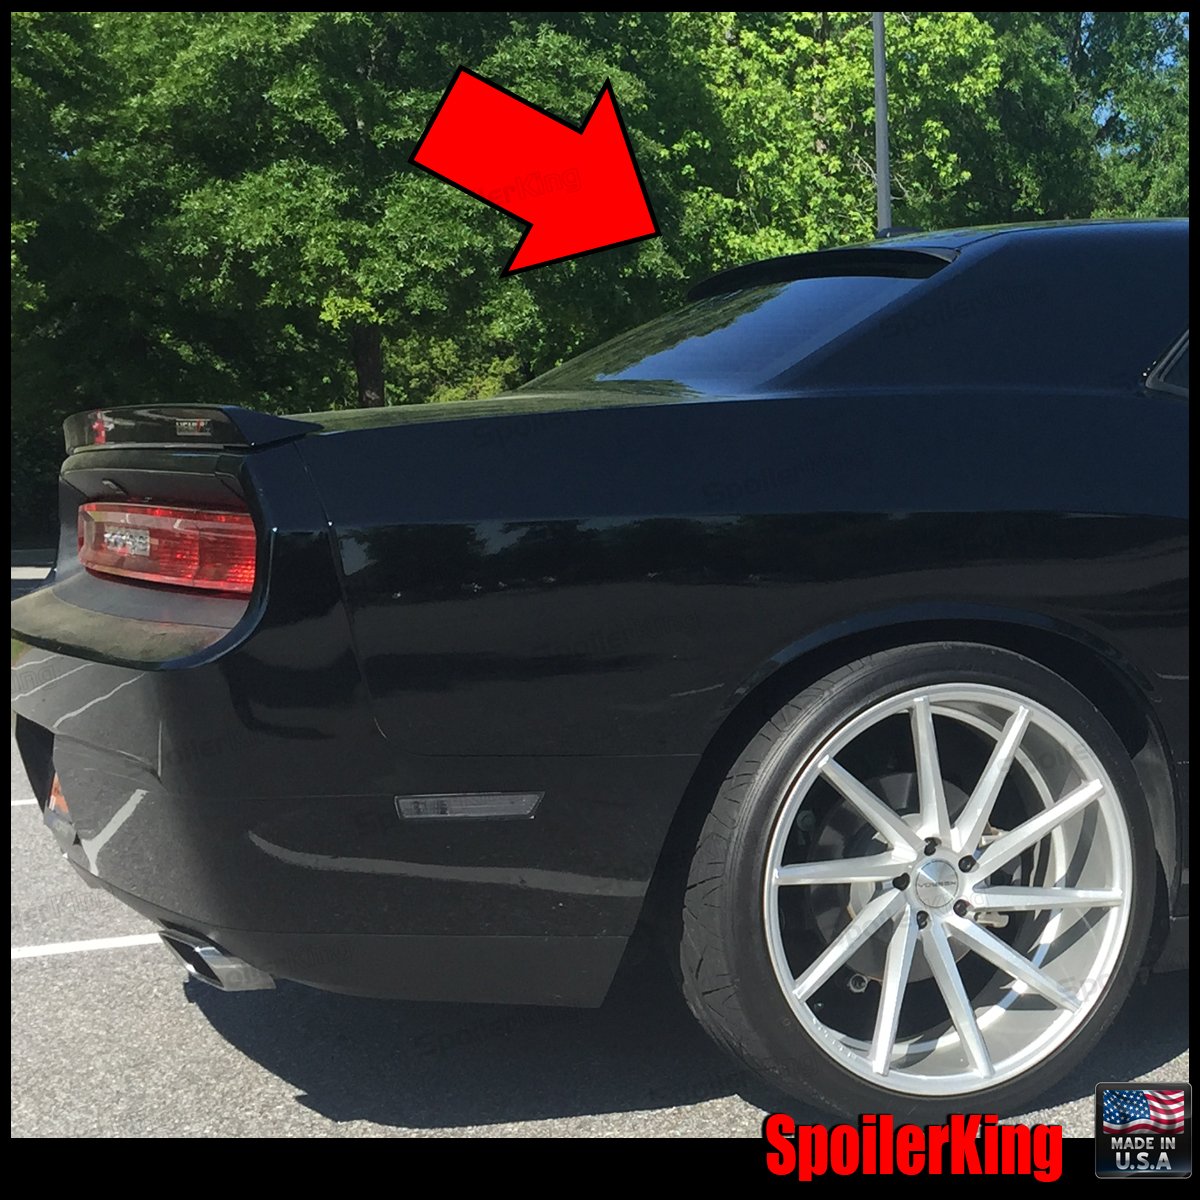
🚀 Elevate your Challenger’s style with the ultimate rear spoiler upgrade!
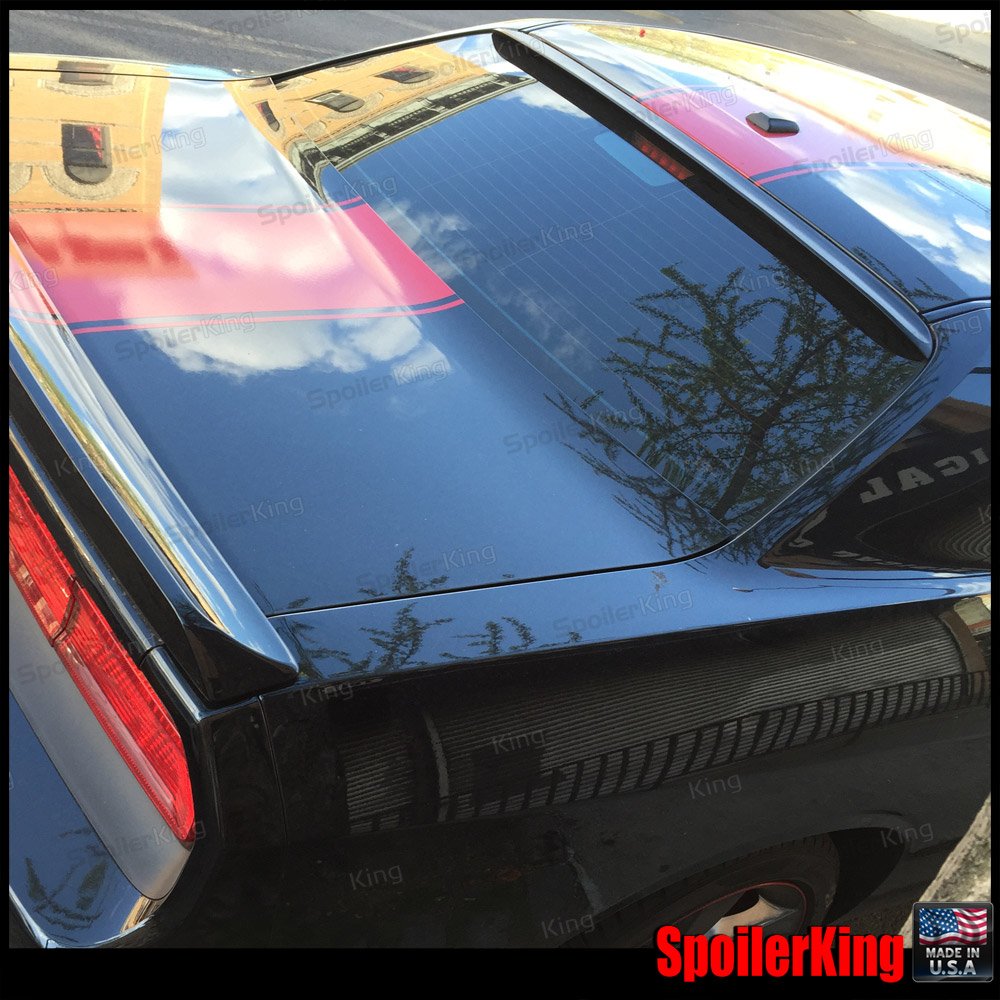
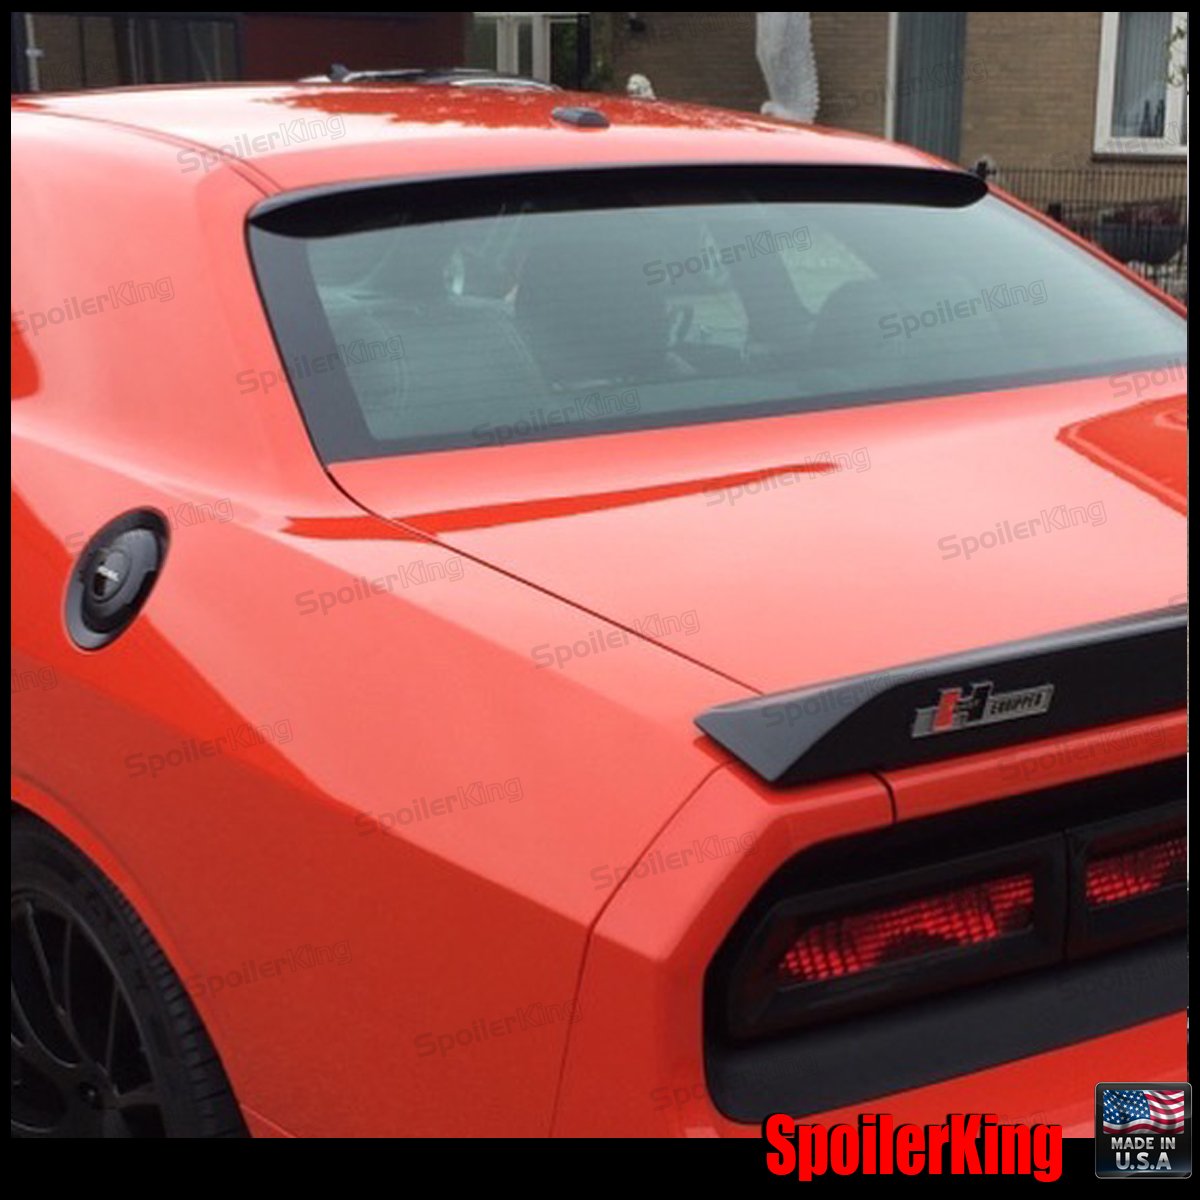
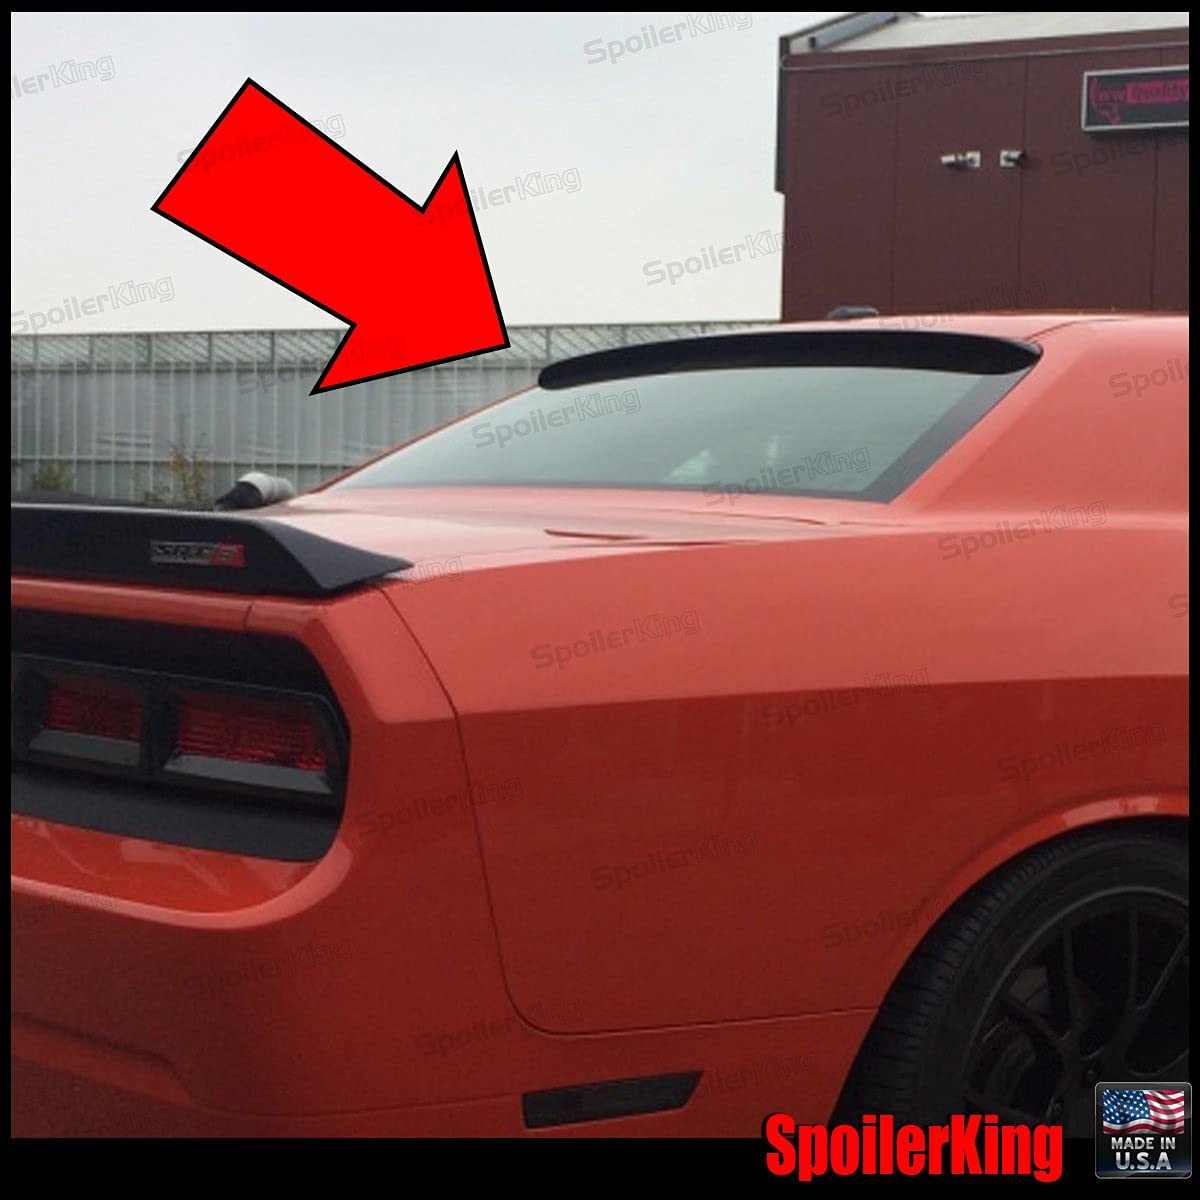
The Spoiler King Rear Window Roof spoiler is a precision-engineered, self-adhesive accessory designed exclusively for Dodge Challenger models from 2008 to 2016. Made in the USA from flexible polyurethane rubber, it offers a durable, flush fit with an unpainted matte black finish ready for customization. Installation is straightforward with included adhesive tape and a detailed manual, making it the perfect upgrade for drivers seeking a sleek, aggressive look without the hassle.
| Auto part position | Rear |
| Installation type | Self-Adhesive |
| UPC | 701142665880 |
| Manufacturer | Spoiler King |
| Model | Challenger |
| Package Dimensions | 41.91 x 40.64 x 8.89 cm; 1.86 kg |
| Manufacturer reference | 701142665880 |
| Manufacturer Part Number | 701142665880 |
| Item Weight | 1.86 Kilograms |
S**S
I was skeptical, but after seeing reviews, I decided to take a dive. I have a 2020 Dodge Challenger SXT. As far as I know, the shape of the rear window hasn't changed for quite some time. In the package, I received the spoiler itself with pre-applied adhesive, 2 SpoilerKing stickers, the manual, 2 isopropyl alcohol pads for prep, and a little tube of primer for prep. I had forgotten to buy the isopropyl alcohol and didn't have any lying around, so this was a nice surprise. As the manual suggests, I let the spoiler warm up on my dash for about ten minutes. While it was heating up, I scrubbed the rear windshield with the alcohol pads. When I was ready, I put the primer adhesive on a cloth and spread it around where the spoiler was supposed to go (it is a thinner liquid initially. If you get it on your fingers, they'll start to stick together). If you make a mess with it, don't worry, you can rub it off later with some elbow grease and your fingernail. From there, I peeled the edge of the tape covering the adhesive off a little bit and lined up one side, trying to keep the spoiler aligned in the process, and pressed the peeled side down, pulling the strips of tape above the spoiler onto the roof a bit to be tugged on later. I then went to the other side, lined it up, and pulled on the strips of exposed tape, unpeeled and pressed down all the way to the other side. When it was all aligned properly, I gave the spoiler a bit of pressure all around to really seal in that bond. I let it sit for about 8 hours. When I came back to my car, I tried to wiggle the spoiler. The car moved instead. It looks great with my blacktop package, as the finish is a flat matte black like the rear spoiler. I don't think it'll be coming off any time soon. Awesome product.
D**N
But looks great and matches the trunk spoiler 👍👍
M**.
You will need to lay it out in the sun to flatten it out. Use 2 people to line it up then hold it in place with painters tape. Clean the window with the alcohol pad and prep provided. I pulled the Red Tape off and pulled it out from under the spoiler when it was I place. Laid perfectly.
J**S
I didn't expect it to be rubber but I like the way it looks. Just put in on today so we'll see how it holds. I used 2 part epoxy as recomended along with the 3M tape on the back. I didn't give 5 stars and almost gave it a 3 star rating because it is extremely difficult to install with trying to keep the epoxy in control and not drip it all over the window or roof. 2 part epoxy sets in about 5 minutes so you have to warm up the spoiler before mixing epoxy, hurry and apply epoxy and install spoiler before it cools down too much and before your expoy sets or else you're SOL! As you know the top of the window on a dodge challenger is pretty high and it's hard to reach the center. I am 5'8" tall and it was pretty difficult to put on by myself. Really does look nice after all is said and done, gives that extra flair no other Challenger has..............(update) 3 weeks on and still holding strong even in the 100 degree weather. Really love the way it looks, changing my 4 star to a 5.......... update #2- had this on for 2 and a half years and still looks excellent through freezing winters and blazing hot summers.
D**C
Nice quality and fast delivery. Adds a sinister look to the car, without the bigger issues of full rear window louvers (which I personally like). Please note, this part is not a rigid ABS part, and is made from a more rubbery material. It handles like a slinky, making installation a (preferred) 2 person job. Also, I did not use the adhesive from the kit. Recommend you install with Marine-Grade silicone, which is aggressive enough to retain the spoiler at pretty much any speed. Find the centerline; apply silicone; blue tape it in the center while holding the outer ends up; position the spoiler from the center toward the outside of the window; and blue tape at center-to-mid and outer ends (no less than 5 segments of blue tape to retain it - more is better). Let it dry over night in a warm are 70F+.
Trustpilot
1 month ago
1 day ago